RSS

Find Your Light Series: Living Rooms

When it comes to interior design, lighting is often an afterthought, and that seems a bit dull. In fact, it should be factored into the layout and décor scheme as early as possible! This is largely because when you’re outfitting a space, having proper lighting is a sure-fire way to add character and elevate its style.


With the right information, you can easily update a room’s lighting fixtures without breaking the bank or exerting too much effort. We’ve already shown you how to illuminate your home’s exterior, kitchen, bathroom, bedroom, and even those tricky underlit places. Now we share a guide on how to choose lighting for one of the most used spaces: the living room.

Read on for tips on finding the right type of light to fit your space’s purpose, style, and mood.

Pick a purpose

The first question you need to ask before you start picking out light fixtures is “why?” What are you trying to achieve with the lighting in your living room? Maybe you want to liven up the space with a little extra brightness, set a specific mood with ambient lighting, or simply want to add a statement piece of décor. Once you figure out the purpose lighting will serve in your living room, the rest of the process becomes easier.


A good idea when choosing lighting for your room is mapping out the intended layout and creating a blueprint of your current lighting. This will highlight where you have overhead fixtures, potlights, windows, and lamps so you can get a big-picture view of what’s already available to you. It can also help to take pictures of your space in the morning, afternoon, and evening so you know the areas hit with natural light and where you may need to make up the difference. This part also lets you know where you should, or should not, put things like a television or reading chair. Direct sunlight is great if you want to read a book in the afternoon, but not so great if you’re hoping to binge an entire season of something on Netflix!


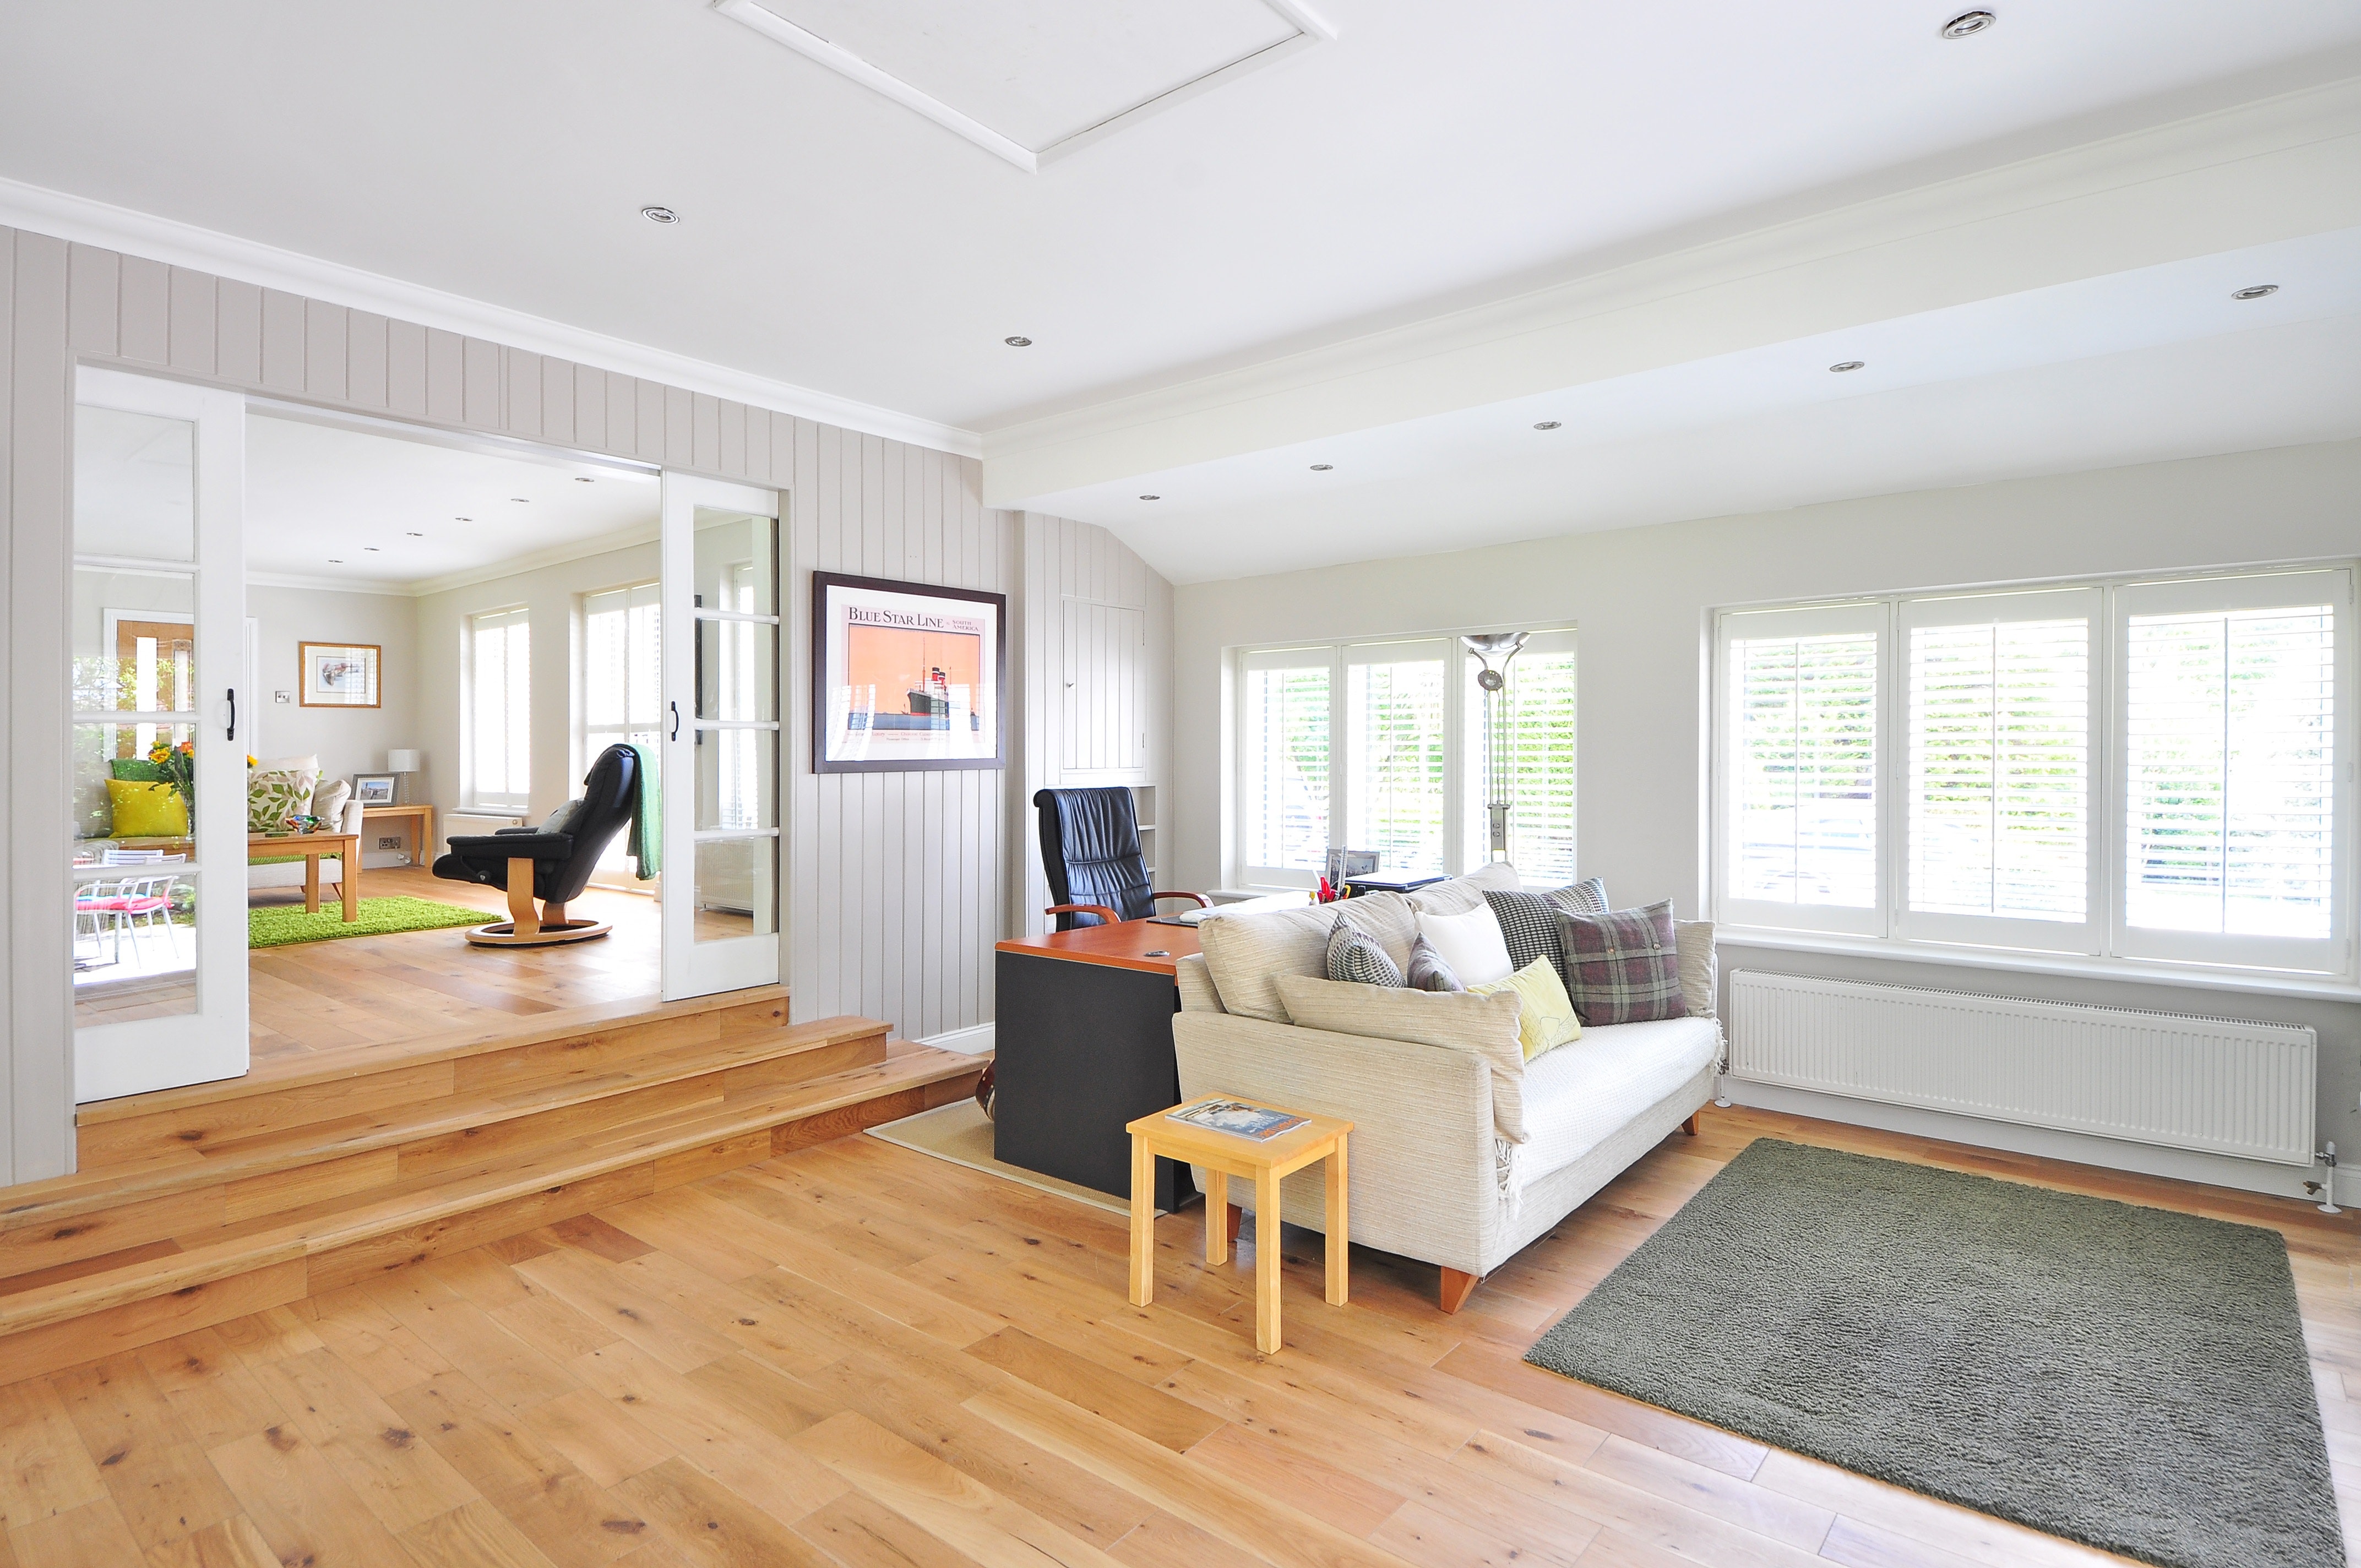
Keep in mind, lighting doesn’t have to serve a singular purpose. It can be a multi-use fixture that adds to your room in more ways than one. For example, if you have a statement piece of artwork on your wall, using a spotlight or gallery lighting can call attention to this while also providing overall light for the room. Alternatively, you might not want pot lights shining directly down on you if the space will double as a home office, as this type of lighting is not the most flattering for people. 

Know your layers

You’ve likely heard the words ambient, accent, and task in descriptions about lighting. These are the three layers of light you should consider. Layered lighting is key in bringing dimension and balance to a room. 


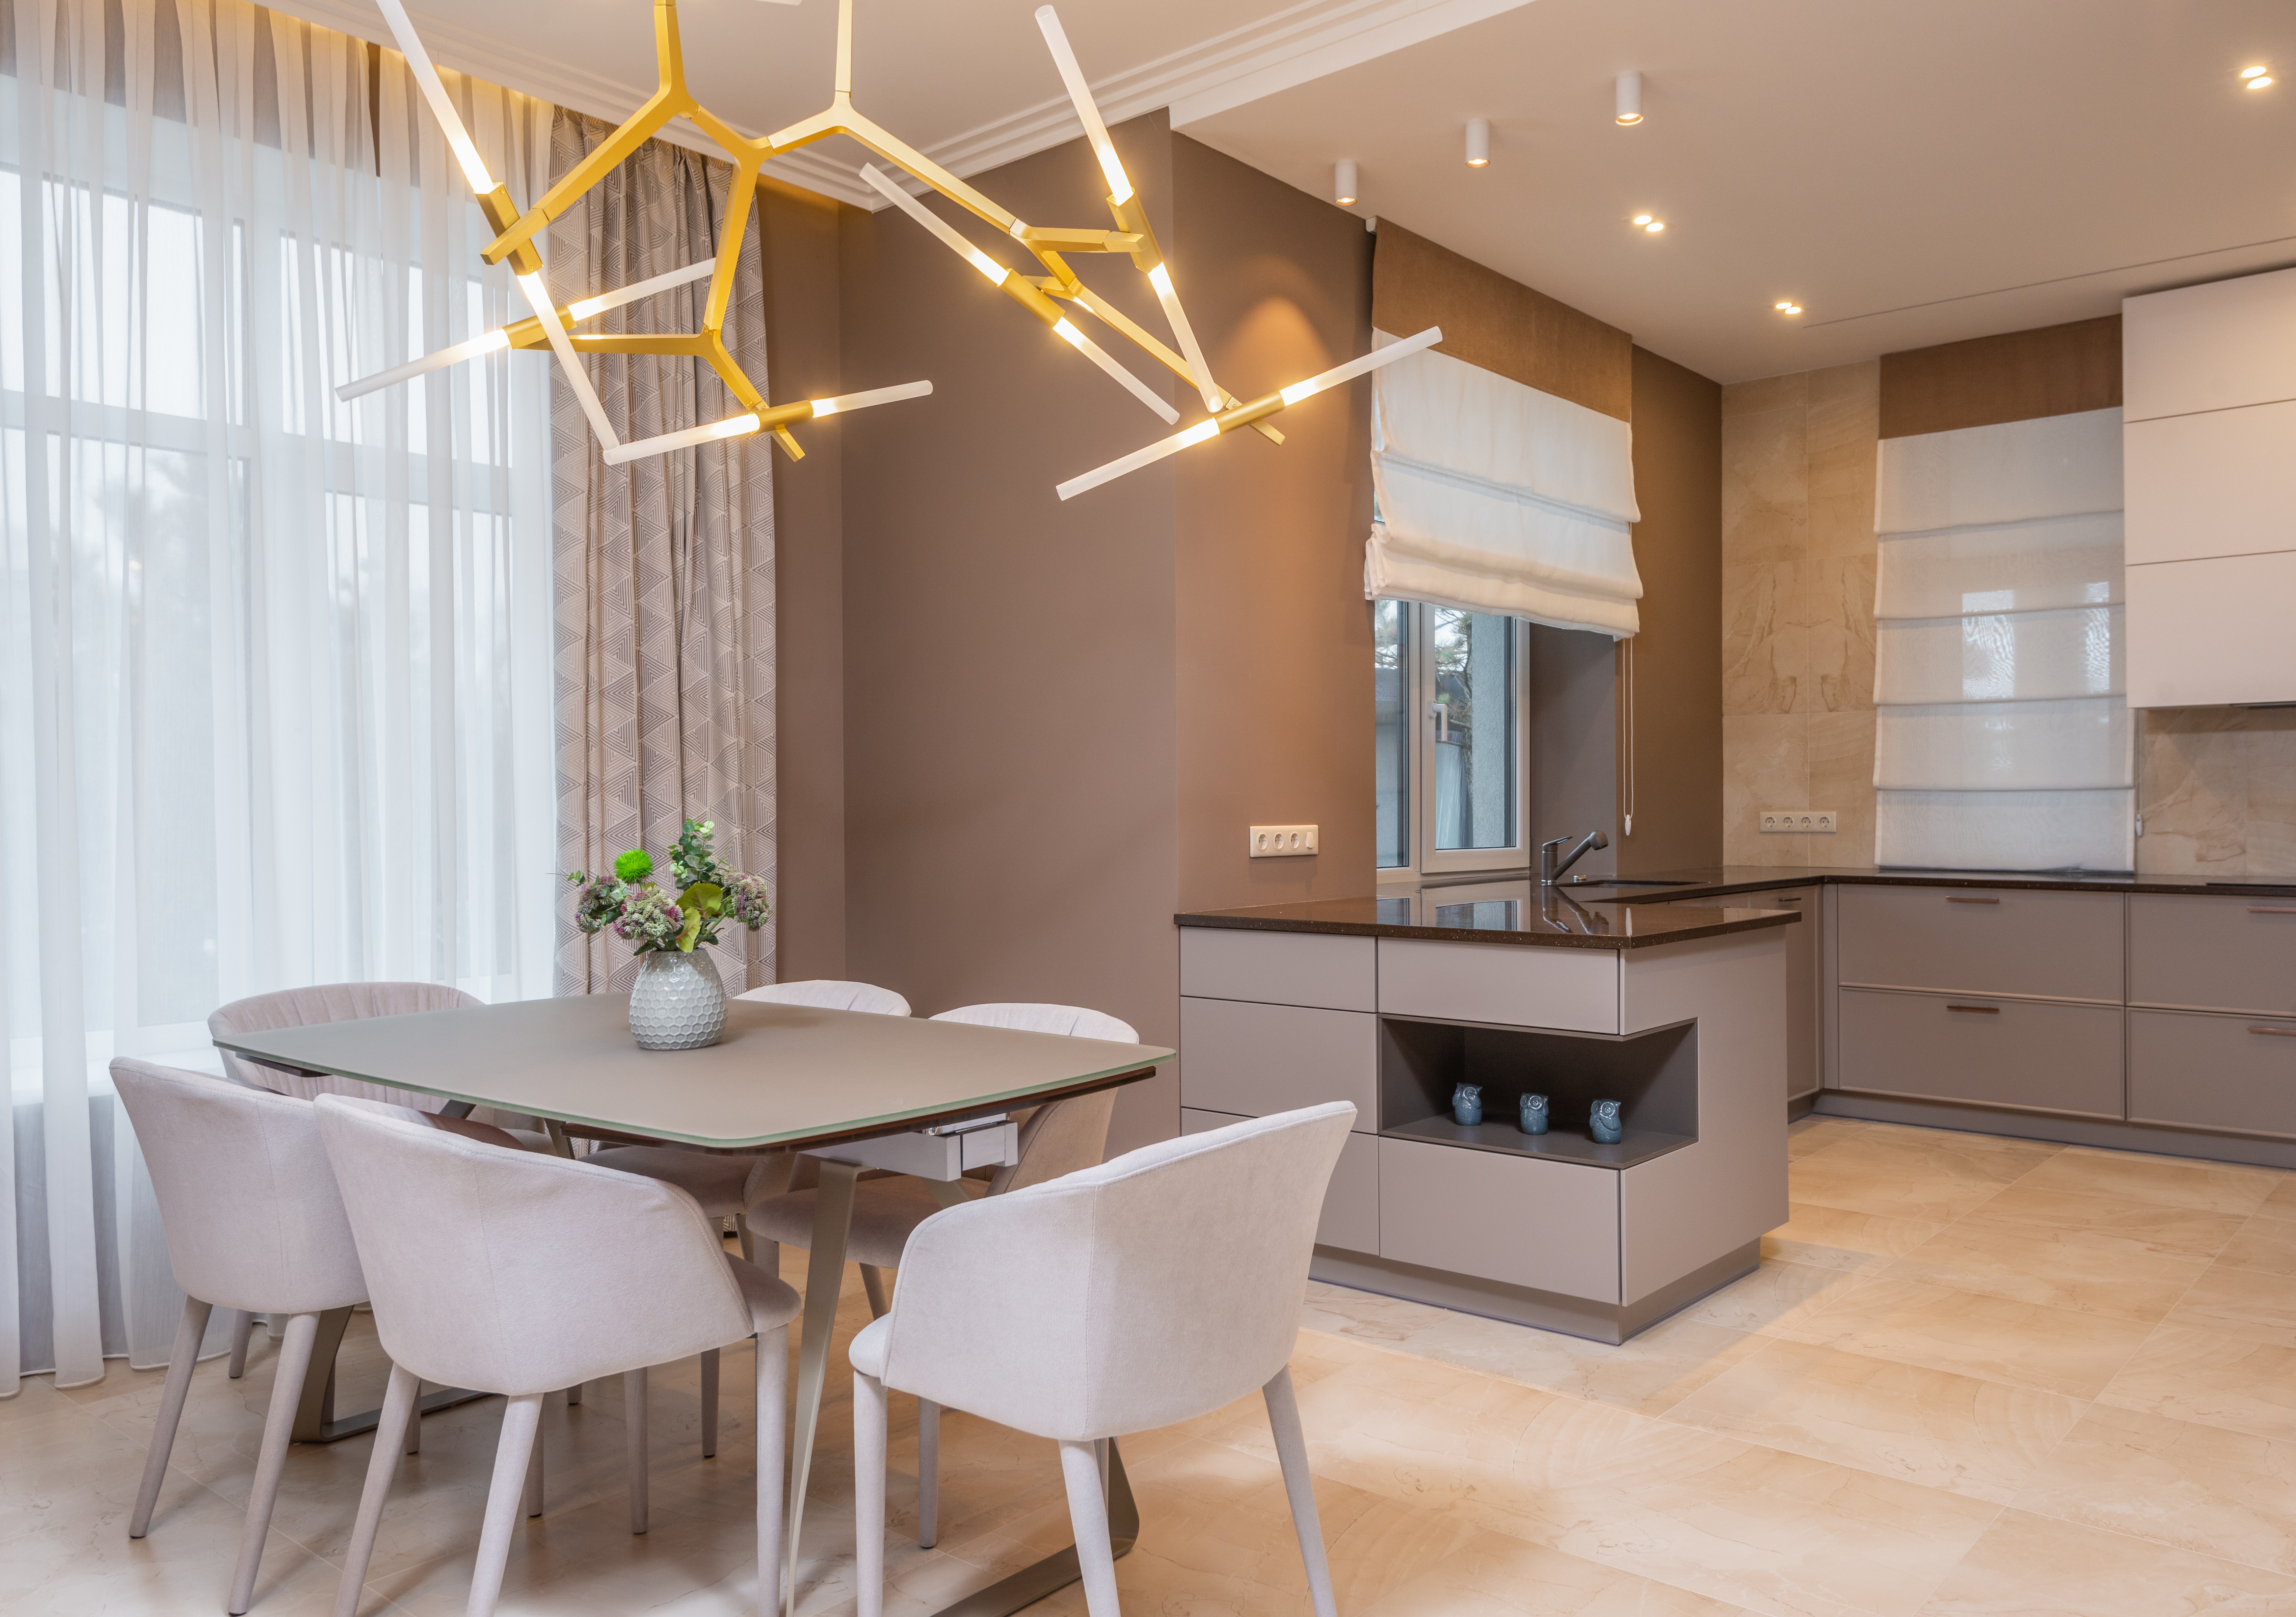
Ambient, also known as general lighting, is what illuminates the overall room. Overhead lights are the most common fixtures for ambient/general lighting, but depending on the purpose of the room and your style preferences, you can opt for pendant or pot lights, ceiling fixtures, or chandeliers.


Accent, or decorative lighting, is what helps to create focal points in a room (typically this layer is brighter than ambient). Try directional spotlights, table lamps, wall sconces, picture lights, or LED track lights for under cabinets to brighten up underlit areas and place a focus on a specific object or furniture.


Finally, as its name indicates, task lighting is used to brighten spots where you perform certain tasks. Choose floor, desk, table, or sconce lamps for task-based lighting. If you’re using the lamp to read or perform activities that may cause eye strain, get a task light with LED bulbs–your retinas will thank you.

Find the right temperature

There’s more to bulb talk than LED and incandescent. First, you’ll need to determine how you want to feel in your living room. Your answer will help you figure out what colour temperature (measured in degrees Kelvin) you should try.


If you’re pining for soft, warm, and cozy, then you want a bulb with a colour temperature between 2,700K and 3,500K. This type of bulb will soften the atmosphere of the living room and make it more inviting.


For a brighter feel, try a bulb with 4,000K and 5,000K colour temperatures. This type of lighting works best for living rooms with neutral and cooler hues, like whites, greys, blues, and greens on the wall and furniture.


What if you want the “daylight” always radiating through your living room? Go for a full spectrum bulb between 5,000K­ and 6,500K. This type of lighting can be harsh, so it’s best to be used as a task light in areas of the living room where you do most of your work. When choosing the temperature of your light in one area, it’s important to consider the other rooms in your home. If you have an open floorplan where light from one room bleeds into another, try to stay consistent with the lighting colour—using cooler hues in the living room when the adjoining dining room uses warmer tones could appear disjointed. 


Lighting stores are a great resource when trying to decide what colour temperature to choose. They can make recommendations based on your flooring, paint colours, natural light, and overall feel of the space. Those pictures you took during the initial planning stages of your lighting scheme will be of great use here, too. 

Embrace the tech

Being able to control the level of lighting in your living room with the touch of a button is peak control. Whether it’s for aesthetics or functional reasons, installing dimmers can help set the mood, but it will also save you energy. You’ll just need to make sure the bulb you’re using can be dimmed.


You can also opt for Wi-Fi or Bluetooth-enabled smart lights. Once installed, you can control the lights with your phone or tablet from anywhere in and out of your home.


Whatever your purpose is for switching up the lighting in your home, you can find the style, fixture, bulbs, and tech to help you achieve your outcome. Adding lighting is not only a cost-effective way to make your living room look like it got a makeover, but it’s also a great tactic for staging a home. Strategically adding layers of light, including natural lighting, will help enhance key features of your home–and that’s appealing to more buyers if you’re in the market. If you’re ready to sell, but feel unsure about how to stage your space, you should get in touch with a REALTOR®.


Source: https://www.realtor.ca/blog/find-your-light-series-living-rooms/25133/1366
Photo: pexels.com

Read

Home Sales Forecast to Ease but Remain Historically Strong in 2022-2023
Home sales have kicked off 2022 below 2021 levels, while price growth has continued to set records. This is consistent with strong demand meeting end-of-month inventory levels that are lower than they have ever been.
 
Along with the ongoing supply crisis, the other main factor expected to impact housing markets this year and next will be higher interest rates.
 
While discounted five-year mortgage rates have already begun to rise – a jump last spring followed by a steady upward trend since last October – and are now back above pre-COVID-19 levels, the Bank of Canada has only just announced its first quarter point hike in early March.
 
Analysts surveyed by Bloomberg Economics see the overnight rate ranging from 1.75% to 2.75% by the end of 2023. That said, given markets are currently pricing in 1.75% by the end of 2022, it is more likely to be the latter. That would make for nine Bank of Canada quarter-point rate hikes by the end of next year.
 
Having said that, it’s important to note Canadian borrowers must qualify for their mortgage loans at the stress test rate (currently set at 5.25%), which is currently somewhere in the range of 245 basis points above the typical discounted five-year rate.
 
The original intent of the stress test was a buffer of around 200 basis points, which is likely why the Office of the Superintendent of Financial Institutions (OSFI) chose not to move the stress test rate following their December 2021 re-evaluation.
 
As such, recent higher market rates have not really made it any more difficult to qualify for a mortgage, and borrowers are still being stress tested at a very robust level.
 
Another wildcard are the housing policy changes announced in last year’s federal election campaign. Which of these will become policy in 2022 and beyond and how will these affect housing markets across Canada? The answers should become clearer when the Federal Budget is published later this spring.
 
Finally, to quote the Bank of Canada from their most recent policy announcement: “The unprovoked invasion of Ukraine by Russia is a major new source of uncertainty. Prices for oil and other commodities have risen sharply. This will add to inflation around the world, and negative impacts on confidence and new supply disruptions could weigh on global growth. Financial market volatility has increased. The situation remains fluid and we are following events closely.”
 
With all of that said, some 612,800 properties are forecast to trade hands via Canadian MLS® Systems in 2022 — a decline of 8.1% from 2021 but still the second-highest annual figure ever by a sizeable margin.
 
This projection is basically the same as it was in the December 2021 forecast, though under the surface, downward revisions to British Columbia, Manitoba, Ontario, Quebec, New Brunswick and Nova Scotia offset a considerable upward revision to the sales forecast for Alberta, along with smaller upward revisions to Saskatchewan and Newfoundland & Labrador.
 
The national average home price is now forecast to rise by 14.3% on an annual basis to $786,000 in 2022. Not surprisingly, this is higher than the previous forecast, as prices have continued to set new records, reflecting the unprecedented imbalance of housing supply and demand. The number of months of inventory nationally was a record-low 1.6 in December 2021, and January and February 2022. The long-term average for that measure is a little over five months. It is quite possible the risk to this price forecast is still to the upside.
 
Home sales are forecast to remain historically strong in 2023 while continuing to move slowly back in the direction of the longer-term trend. Limited supply, higher prices and higher interest rates are expected to further tap the brakes on activity and price growth in 2023 compared to 2022, particularly in Canada’s most expensive markets.
 
National home sales are forecast to edge back a further 2.7% to 596,150 units in 2023 – still the third-best year on record. This easing trend is expected to play out most notably in British Columbia, Ontario and Quebec. Alberta and Saskatchewan are forecast to buck the trend with moderate sales gains in 2023.
 
Other provinces are forecast to see fairly little change in sales between 2022 and 2023 as economic growth, population growth, and supportive demographic trends under the surface are counterbalanced by supply and affordability challenges.
 
The national average home price is forecast to rise by a modest 3.2% on an annual basis to just under $811,000 in 2023. While the $800,000 mark may seem an unlikely milestone to hit given where the market was just a couple of years ago, it should be noted that with the national average price having already surged (though likely only temporarily) to more than $816,000 in February 2022, this is a conservative forecast.
 
 
Source: https://www.creacafe.ca/home-sales-forecast-to-ease-but-remain-historically-strong-in-2022-2023/
Photo: pexels.com
Read

Top Paint Colours for 2022

The greatest canvas in your home are the walls. And the paint colours you choose are one of the boldest ways you can put your personality on display. But with millions of colour permutations out there, how do you possibly narrow down your favourite shades? Why not start by perusing this list of top paint colours for 2022.


This year’s paint trends are all about serene, tranquil colours that bring nature indoors. They’re subtle, warm, and allow you to be versatile in your design—which means you’ll be able to put them in almost any room for a fresh, earthy atmosphere. And whether your aesthetic is modern, traditional, cottagecore or anything else, these top paint colours will seamlessly fit into your style.


Botanical greens 

Paint brands Benjamin Moore, PPG, Glidden, and Sherwin-Williams have all put forward earthy, natural greens as their top paint colours in 2022. Look for October Mist, Olive Sprig, Guacamole, and Evergreen Fog respectively and apply generously in your bedroom, living room, or kitchen for a harmonious and rejuvenating vibe.


These paint colours will pair well with floors and furniture in blonde and warm wood tones. Decorate with gold and black accents if you like sleek and modern, or for a more organic feel, embrace beige and camel. For your kitchen and bathroom, you can’t go wrong combining any of these botanical greens with white subway tile.

Thalassic blues

Graham & Brown and Behr are both on board for the blue paint trends in 2022, offering you refreshing hues in Breathe and Breezeway, reminiscent of sea glass and sea foam.


These soft blues are well suited to colour drenching, the practice of painting everything on the wall including trim and doors. They’ll be perfect for living rooms and home offices, bringing the outside in, like a breath of fresh ocean air.


Accent Breathe with deeper blues and mustard yellow and Breezeway with terra-cotta, pinks, and earthy tones likewhite, taupe, and soft brown. For a modern and sleek look, opt for a monochromatic palette. These shades will both pair well with natural textures and fabrics, such as leather, rattan and even reclaimed and rough, minimally treated wood.

Warm neutrals

Valspar’s Subtle Peach isn’t quite neutral, but it’s soft, subtle, and a beautiful colour perfect for intimate spaces. But don’t limit yourself to just closets and bedrooms for its use—it’s also perfectly suited to bathrooms and living rooms, especially if you want to feature a bold piece of art or a gallery wall. It blends well into the background and won’t steal any attention away from your showstopping décor.


Also in this category is Valspar’s Gilded Linen, a warm white that will suit open plan spaces, entries, and hallways. According to Valspar, Gilded Linen is an “ultra-clean neutral that organizes and connects spaces throughout the home.” They recommend it for minimalist décor, and to mix it with wood and greenery for a natural feel.

Paint trends for every personality

Whether you’re in the suburbs or the heart of the city, these top paint colours of 2022 will have you feeling like you’re surrounded by nature with wide open sky above you.


Green, blue, peach or white, these paint trends befit the rise in sustainable and eco-friendly living practices, combining harmoniously with reclaimed wood, natural textiles like cotton, jute, and rattan, and vintage furniture and décor elements. There’s simply nothing artificial feeling about these paint trends and depending on personal style, they can be matched with a variety of design aesthetics.


What’s most important is the top paint colours of 2022 promote flexibility so it’s your personality always shining through. 


Source: https://www.creacafe.ca/top-paint-colours-for-2022/
Photo: pexels.com

Read

Tips for Helping Buyers Navigate New Home Construction

Whether your clients are seeking to buy into a new house already built, a semicustom home as part of a development or a pure custom home built to their personal specifications, you’ll want to help them create a schedule that allows pertinent questions to be asked in advance for the builder and throughout the build process.


While new builds tend to be designed with modern living in mind, have the latest in technology and plumbing, electrical and efficiency systems, you want to steer your clients to reputable builders and include references from people who have bought their finished products.


“No matter what you are buying, it is always a case of buyer beware,” says Fox, who has been involved in every type of home build and sale over the past 30 years. “There is no such thing as a stupid question in this process. Ask everything you want to know and put it in writing.”

Determine the warranty and financial details

The warranty program for a new home will likely provide protection against defects, determine how fit the home is to live in, address construction practices and consider other aspects of the build, so it’s important that your clients understand what it does and does not cover.


Every province has a different warranty program, including Ontario, which along with the provinces of Alberta, British Columbia and Quebec, requires builders to provide home buyers with a third-party warranty.


Elsewhere in Canada, a home warranty is left up to the builder, although Canadian Home Builders’ Association (CHBA) members must offer one as a condition of membership. You can search for professionals on the CHBA website.


“You need to be aware – does my house have a warranty and is it enrolled in a warranty program and if not, why not?” Fox says. “Ask who is backing up the warranty program. And even if you are buying a resale, is the builder offering a warranty? You need to know what might happen if, say, there is a leak in the roof or a crack in foundation.” All these are important questions a REALTOR® should make sure their clients ask.


Another consideration for new construction home buyers in some provinces, like Ontario, Saskatchewan, British Columbia and Nova Scotia, is the provincial sales tax (such as the harmonized sales tax in Ontario). New home construction in these provinces are subject to this tax but a resale is not. Make sure your clients check to see if there is provincial sales tax and if it is built into the new home construction price. Your client may be eligible for the GST/HST New Housing Rebate.


You will also want to make sure your clients ask what protections there are for the deposit and who holds it. In Ontario for example, condo deposits are held by a solicitor and the builder in a trust account but for houses, the deposit can go right to the builder and he or she can use it to build the house.

Make a detailed schedule and checklist

Once your clients have covered basics such as securing financing, getting pre-approved for the buy, determining budget, knowing the taxes and having a general knowledge of detail items such as window treatments, it’s important that buyers and builders agree on a schedule where items can get checked off as they are completed, says Fox. There can be delays but having an agreed upon schedule is a great guideline.


What may seem like small details add up to the entirety of the build. For example, how many pot lights per square foot is the builder allowing? What are the appliances, what are the countertops, what are the baseboards and windows, what kind of garage door, what is the heating and cooling system?


“We are talking several pages, here, not a quick list that is five lines,” says Fox.


This schedule should also include a payment structure: what buyers need to pay and when. Often with new builds you are making payments in installments, but make sure this is all laid out ahead of time.

Buyers should also be aware that any upgraded features could mean upgrades in your payments. As their trusted advisor, you should be able to help decipher any confusing clauses in fine print.

Research the lot and the neighbourhood

When purchasing preconstruction, it’s important your clients look at what’s happening in the neighbourhood. If it’s a new subdivision, is a change in the demographic bringing more young families into it and, if so, are there provisions with the municipality for a new school—or does the existing school have enough capacity?


“Lots of times we see new subdivisions go up but there isn’t adequate public transportation or schooling,” says Fox.


If your client is buying an infill where an old house has been torn down for a new one, you want them to determine what’s on the lot environmentally. For example, old houses might have been on an oil heating system and you want to know if there is perhaps a buried oil or propane tank on the property.


“Even if an old pool has been filled in, you want the builder to warrant it, because it could impact your insurance later,” says Fox. “You want to determine things like, did they keep the old foundation or is it brand new?”


There can be other surprises along the way, such as restrictive covenants common in subdivisions, which can prevent residents from erecting, say, clothes lines or fences over a certain height.


It’s common to see a registered easement for electricity wires that run across the back of land, which means utility companies can have the right to cross your property, says Fox. So, if your clients want to build a pool, there could be easements that would prevent them from doing so.

Make sure there is an inspection

Vancouver REALTOR® and agent Ron Basra, of Re/Max Select Realty, has specialized in spec homes during his 25 years in the business.


He recommends to buyers that, aside from researching the builder’s reputation, they need to get a reputable inspector to ensure the job has been done right.


“When you do your research on the builder, see if they are just doing it part time and if she or he has any claims against them under the warranty program,” says Basra. “Look at previous homes the builder has built and, if you can, talk to homeowners who have purchased before you.”


In the end, buying new home construction is a considerably different process than with resale homes.


There can be delays, usually more money has to be paid up front (although new builds can have the advantage that a price can be locked in early) and warranties and any upgrades need to be well understood by the buyer.


Source: https://www.creacafe.ca/tips-for-helping-buyers-navigate-new-home-construction/
Photo: pexels.com

Read

Over Your Head: What to Know About Roofs

Is the roof of your home in good condition? Don’t feel bad if you don’t know the answer—many homeowners are often unaware of the state of their roof. Out of sight, out of mind, right? Unless there are obvious damages, such as cracks or leaks, it’s easy to forget about this exterior part of your home.


Whether you’re buying, selling, or you’re a homeowner who simply wants to know how to keep your roof in good shape, you’ve come to the right place. Here are three of the most asked questions about roofs.


What are the different types of roofs?
Roof materials come in different forms­: metal/tin, asphalt, wood, cedar, slate, and clay are the most common types. With a plethora of options, it gets tricky when trying to choose the best option for your home and wallet. The type of roof installed on your home depends on a variety of factors such as location, environment, style, budget, building codes, and maintenance requirements. In Canada, asphalt, wood/cedar, and metal roofs are among the most popular.

Asphalt shingles

Life expectancy: 15 to 20 years (or more)


Pricing: $2 to $6 per square foot


Pros: There are a few types of asphalt shingles, but the two main varieties are basic or architectural, with architectural being the more durable of the two. Asphalt roofs are the most popular type of roof in Canada because of the material’s ability to withstand the damp and snowy weather. This type of roof is typically the most affordable of all the options. Additionally, asphalt shingles are relatively easy to install and repair, and they’re fire resistant. Asphalt shingles come in a variety of colours and styles (for example, fibreglass and organic asphalt), so it can be customized to fit any home’s exterior aesthetics.


Cons: Harsh Canadian winters can cause chips and cracks on the asphalt. The material is also prone to mildew and can incur granule loss if not properly maintained. Be prepared for repairs before the 15 years are up.

Wood or cedar shakes

Life expectancy: 35 to 50 years


Pricing: $8 to $15 per square foot


Pros: Wood or cedar shakes are extremely durable, not to mention resistant to harsh weather and insects. For these benefits and more, this type of roof can include a warranty of up to 50 years—depending, of course, on who you buy from. For homes in colder climate and heavy rainfall areas, wood or cedar shakes are an excellent choice because they prevent moisture buildup and they’re naturally insulating. 


Cons: In addition to high upfront costs, the material is not fire resistant (Class C rating), so you’ll need to apply additional treatment to get a Class A rating. Moss buildup can also occur on wood or cedar shakes if they’re not cleaned on schedule (usually every two to three years). Another con for wood or cedar shakes can be their appearance, as many people don’t find them as visually appealing as other materials. 

Metal

Life expectancy: 40 to 70 years


Pricing: $6 – $20 per square foot


Pros: Metal roofs, whether aluminum, tin, copper, zinc or steel, can offer unparalleled longevity. Unlike asphalt shingles, metal roofs require little to no maintenance. You may never have to repair or replace this type of roof, providing it’s properly installed. Metal roofs are great in high snowfall areas because the ice can easily slide off, reducing risk of collapse.


Cons: Metal roofs, because of their premium quality, are expensive. They cost slightly more than wood or cedar, and can be 10 times the price of asphalt shingles. They’re also prone to being noisy during some extreme weather conditions, especially if the installation, or your attic insulation,  isn’t top notch. On the curb appeal front, metal is not always favoured because it can be difficult to maintain colour consistency across the entire roof.

Adding solar panels to your roof

Certain provinces and municipalities offer incentives for energy efficiency, which can help offset the upfront cost of installing solar panels on your roof. The cost will ultimately vary depending on the size of your system and equipment you use, but on average, the price of solar power in Canada is $3.01 per Watt. Adding solar panels can help reduce your monthly energy bills, not to mention help lower your impact on the environment by using a renewable source of energy. Curious to find out if adding solar panels will affect your resale value? We’ve taken a look at whether that’s the case, or you can reach out to a local REALTOR® for their insight on what current trends are in your neighbourhood. 

What upkeep is required to maximize a roof’s life expectancy?

Keep it clear

Make sure your roof is always free of debris, including leaves, sticks, branches, and other naturally occurring particles that can, over time, contribute to the roof’s wear and tear. Make sure your roof is also mildew, mould, and moss free.

Don’t ignore the landscaping

If you have trees near your roof or shrubs close to your gutters, make sure to keep up with the landscaping. Falling branches and other parts can cause premature damage, while shrubs and bushes can block the gutters. Also, trees can make it easy for rodents to access the roof and make it their home, so it is important to keep branches trimmed.

Clean the gutters

Keep your gutters clog-free by getting them cleaned at least once a year. This will prevent water (from rain and snow) from pooling on your roof and causing damages.

Inspect regularly

Depending on the type of roof and warranty it comes with, you may need to get your roof checked annually. If you know what to look for, you can do it yourself, but it’s always best to leave it to the professionals with trained eyes and special tools.

How can you tell if your roof needs repair or replacing?

There are a few indicators something is wrong with your roof. It’s time to call a professional if you see:

  • water spots, streaks, or discolouration on ceilings and walls;
  • a sagging ceiling;
  • cracked or curled shingles;
  • decaying or paint peeling from eavestrough;
  • missing asphalt granules;
  • mould or moss growth;
  • spots without snow, which could indicate a leak; 
  • light coming through from outside;
  • damaged roof deck or flashing (the material that directs water away); or
  • loose roof tiles.


In many cases, the above issues can be easily fixed. Problems like leaks can be repaired by sealing the crack or replacing some shingles. However, you may want to consider replacing the roof altogether if the damage is extensive, if it’s more than 20 years old, or out of warranty. 


A roof replacement may be costly (between $4,700 and $25,000, according to Alpine Credits), but it could save your home from further structural damages and even more expensive repairs in the future. A new roof can also help increase the value of your home because of the safety and curb appeal it adds.


“Roofs are a big ticket item, and significant repairs or replacement count as a major renovation that will help increase the value of your home, similar to upgrading of the windows, furnace, etc.,” says Maniza Khan, a sales representative and REALTOR® with Ottawa-based Rasooli Real Estate Group. “You should take into account the age of the roof, the material used to build it, and what direction the house is facing.”


Source: https://www.realtor.ca/blog/over-your-head-what-to-know-about-roofs/24306/1363
Photo: pexels.com

Read

10 Fool-Proof Decor Tips to Improve Your Interior Design Skills

Most of our homes are works in progress – budget and time are two big factors, but our own design knowledge can also be a constraint. Fortunately, these timeless home-decor tips will show you how to improve your own interior-design skills to create a home that truly reflects who you are.

Read

Floor Renewal Part Two: How to Give New Life to Old Hardwood Floors

If your home was built prior to the 1980s, it’s possible you’ve made a surprising discovery beneath your carpet, vinyl, or laminate flooring—a once-gorgeous hardwood floor. The prohibitive complexity and price of maintenance and repair prompted many homeowners, in previous decades, to cover them over with more cost-effective flooring options. Modern technology, along with DIY know-how, means breathing new life into an old hardwood floor is not only less costly, but a fine way to beautify your space and boost the value of your home.


Ripping up carpet

If you’ve just stumbled upon this exciting revelation or are curious to know if hardwood flooring is hiding in your home, our first article in this series focuses on how to properly remove carpet. We look at checking for hardwood floors without causing undue damage, as well as the steps you should follow to remove carpeting on your own and when to call a professional. 

If you’re ready for the next important steps to renewing a hardwood floor, let’s get started. 

Examine and analyze

Before you run off to the store with dreams of gleaming hardwood floors dancing in your head, remove all furniture and wash the floor thoroughly, then carefully examine every part of the floor to determine how to proceed. Remember, this floor can be more than 40 years old, and as old as Queen Victoria if you live in a century home. 

The key things to look out for are:

  • long or deep gouges;
  • rotten wood;
  • cracks and splits in the boards;
  • wide gaps between boards;
  • protruding nails (in case any were missed when removing your carpet);
  • the original wax finish; and
  • stains or deeply embedded dirt that doesn’t wash off.

If any of the above are present, you’ll have to perform some repair work, which could require fillers, sanding, refinishing, and possible board replacement, depending on the type and extent of wear and damage. On the other hand, if the deep clean reveals a floor with only superficial scratches and wear, you can count your lucky stars, because refinishing will be a much simpler task for you.

A simple refinish

Renewing hardwood flooring that no longer has the original wax finish, and no deep gouges or dents, may only require a wood floor renewal kit from your local hardware store to revive it to a luscious shine. Just bear in mind the polyurethane finish requires 24 hours to set, then seven to 14 days to cure—important factors if you have pets or young children. We’ll go over the steps involved with applying finish shortly.

Repairing hardwood flooring

A wood restoration kit will come in handy to address deep gouges in hardwood flooring. If you have squeaky floorboards, now is the perfect opportunity to hammer those down since you’re already in repair mode—unless you rely on this built-in security system for monitoring teenage past-curfew entries!

Where rotten, split, or cracked boards are concerned, replacing affected sections is the best solution. If you’re experienced with a circular saw, this is something you can handle on your own, but if you are unsure, then you may want to call a carpenter or flooring professional for these repairs. The key challenge is properly matching the colour and grain of the floorboards as best as possible, which can be difficult with some older floors. 

Sand the floor

Here’s where things get dusty, so don a respirator and safety goggles before starting. If you need to remove a layer of embedded dirt or the original wax finish, a belt or drum sander is key—just remember to remove any shoe base moulding and use a floor scraper or putty knife to double-check for any protruding nails before sanding.

Begin with a coarse sandpaper between 36 and 40 grit, and work your way gradually to a finer grit with each pass. Use 60 grit for your second sweep, then 100 grit to smooth the surface further. Remove any dust and debris by sweeping and vacuuming (with a shop vac, not your regular vacuum) between each pass, and use a floor edger or disc sander to get all the corners and edges for a uniform finish.

One final sanding step will help give your floor that professional look—use a floor buffer and fine-grit screening pad with broad sweeping motions to smooth any unevenness or sandpaper scratches. Give the floor another good sweep and vacuum, then use tack cloth to collect any remaining dust particles before applying stain or finish.

Stain and finish

If you’d like to re-stain or change the tone of the floor, now’s the time to select an interior wood stain based on the type of hardwood or desired colour. Work in smaller areas and systematically apply with foam applicators, removing any excess stain with a clean, cotton rag or paper towels.

If you don’t wish to use stain, apply a sanding sealer before finishing.

Once you’re finished with either of the above, you’re ready to apply the finishing coats. Oil or water-based polyurethane wood finishes are the most commonly used these days, with oil-based being the more advisable option as it is thicker and provides a smoother coat. Wood oils like teak, cedar, tung, and Danish, are also popular options. Always be mindful of fumes, wear a respirator, and ensure proper room ventilation. 

Using a lambswool roller or applicator, apply three coats of oil-based finish, or four coats of water-based, sanding lightly between each coat using an extra-fine 220-grit sandpaper or #000 steel wool. This scuffs the surface to allow for the next coat to properly adhere. Be sure to vacuum the dust up before applying the next coat.

Once the final finish has dried (at least 24 hours), replace the shoe guard moulding. Apply felt pads to the feet of all furniture, and limit traffic in the room for seven to 10 days, allowing the finish to fully cure.

Caution: Always hang dry oil-soaked rags thoroughly outside and away from any buildings or structures before disposing of them. Wet oily rags produce their own heat and present a serious fire hazard.


There’s no mistaking that even with a simple refinish, this can be a time-consuming undertaking, but the rewards make it worth the effort. What better conversation piece than a gleaming, beautifully-restored hand-finished hardwood floor? Of course, you may decide after reading this to leave this job to a professional, and that’s OK!! The end result is what’s most important, and as long as you’re happy with the outcome, that’s what matters most. 


Source: https://www.realtor.ca/blog/floor-renewal-part-two-how-to-give-new-life-to-old-hardwood-floors/24422/1367%204/1
Photo: pexels.com

Read
MLS® property information is provided under copyright© by the Vancouver Island Real Estate Board and Victoria Real Estate Board. The information is from sources deemed reliable, but should not be relied upon without independent verification.