RSS

Over Your Head: What to Know About Roofs

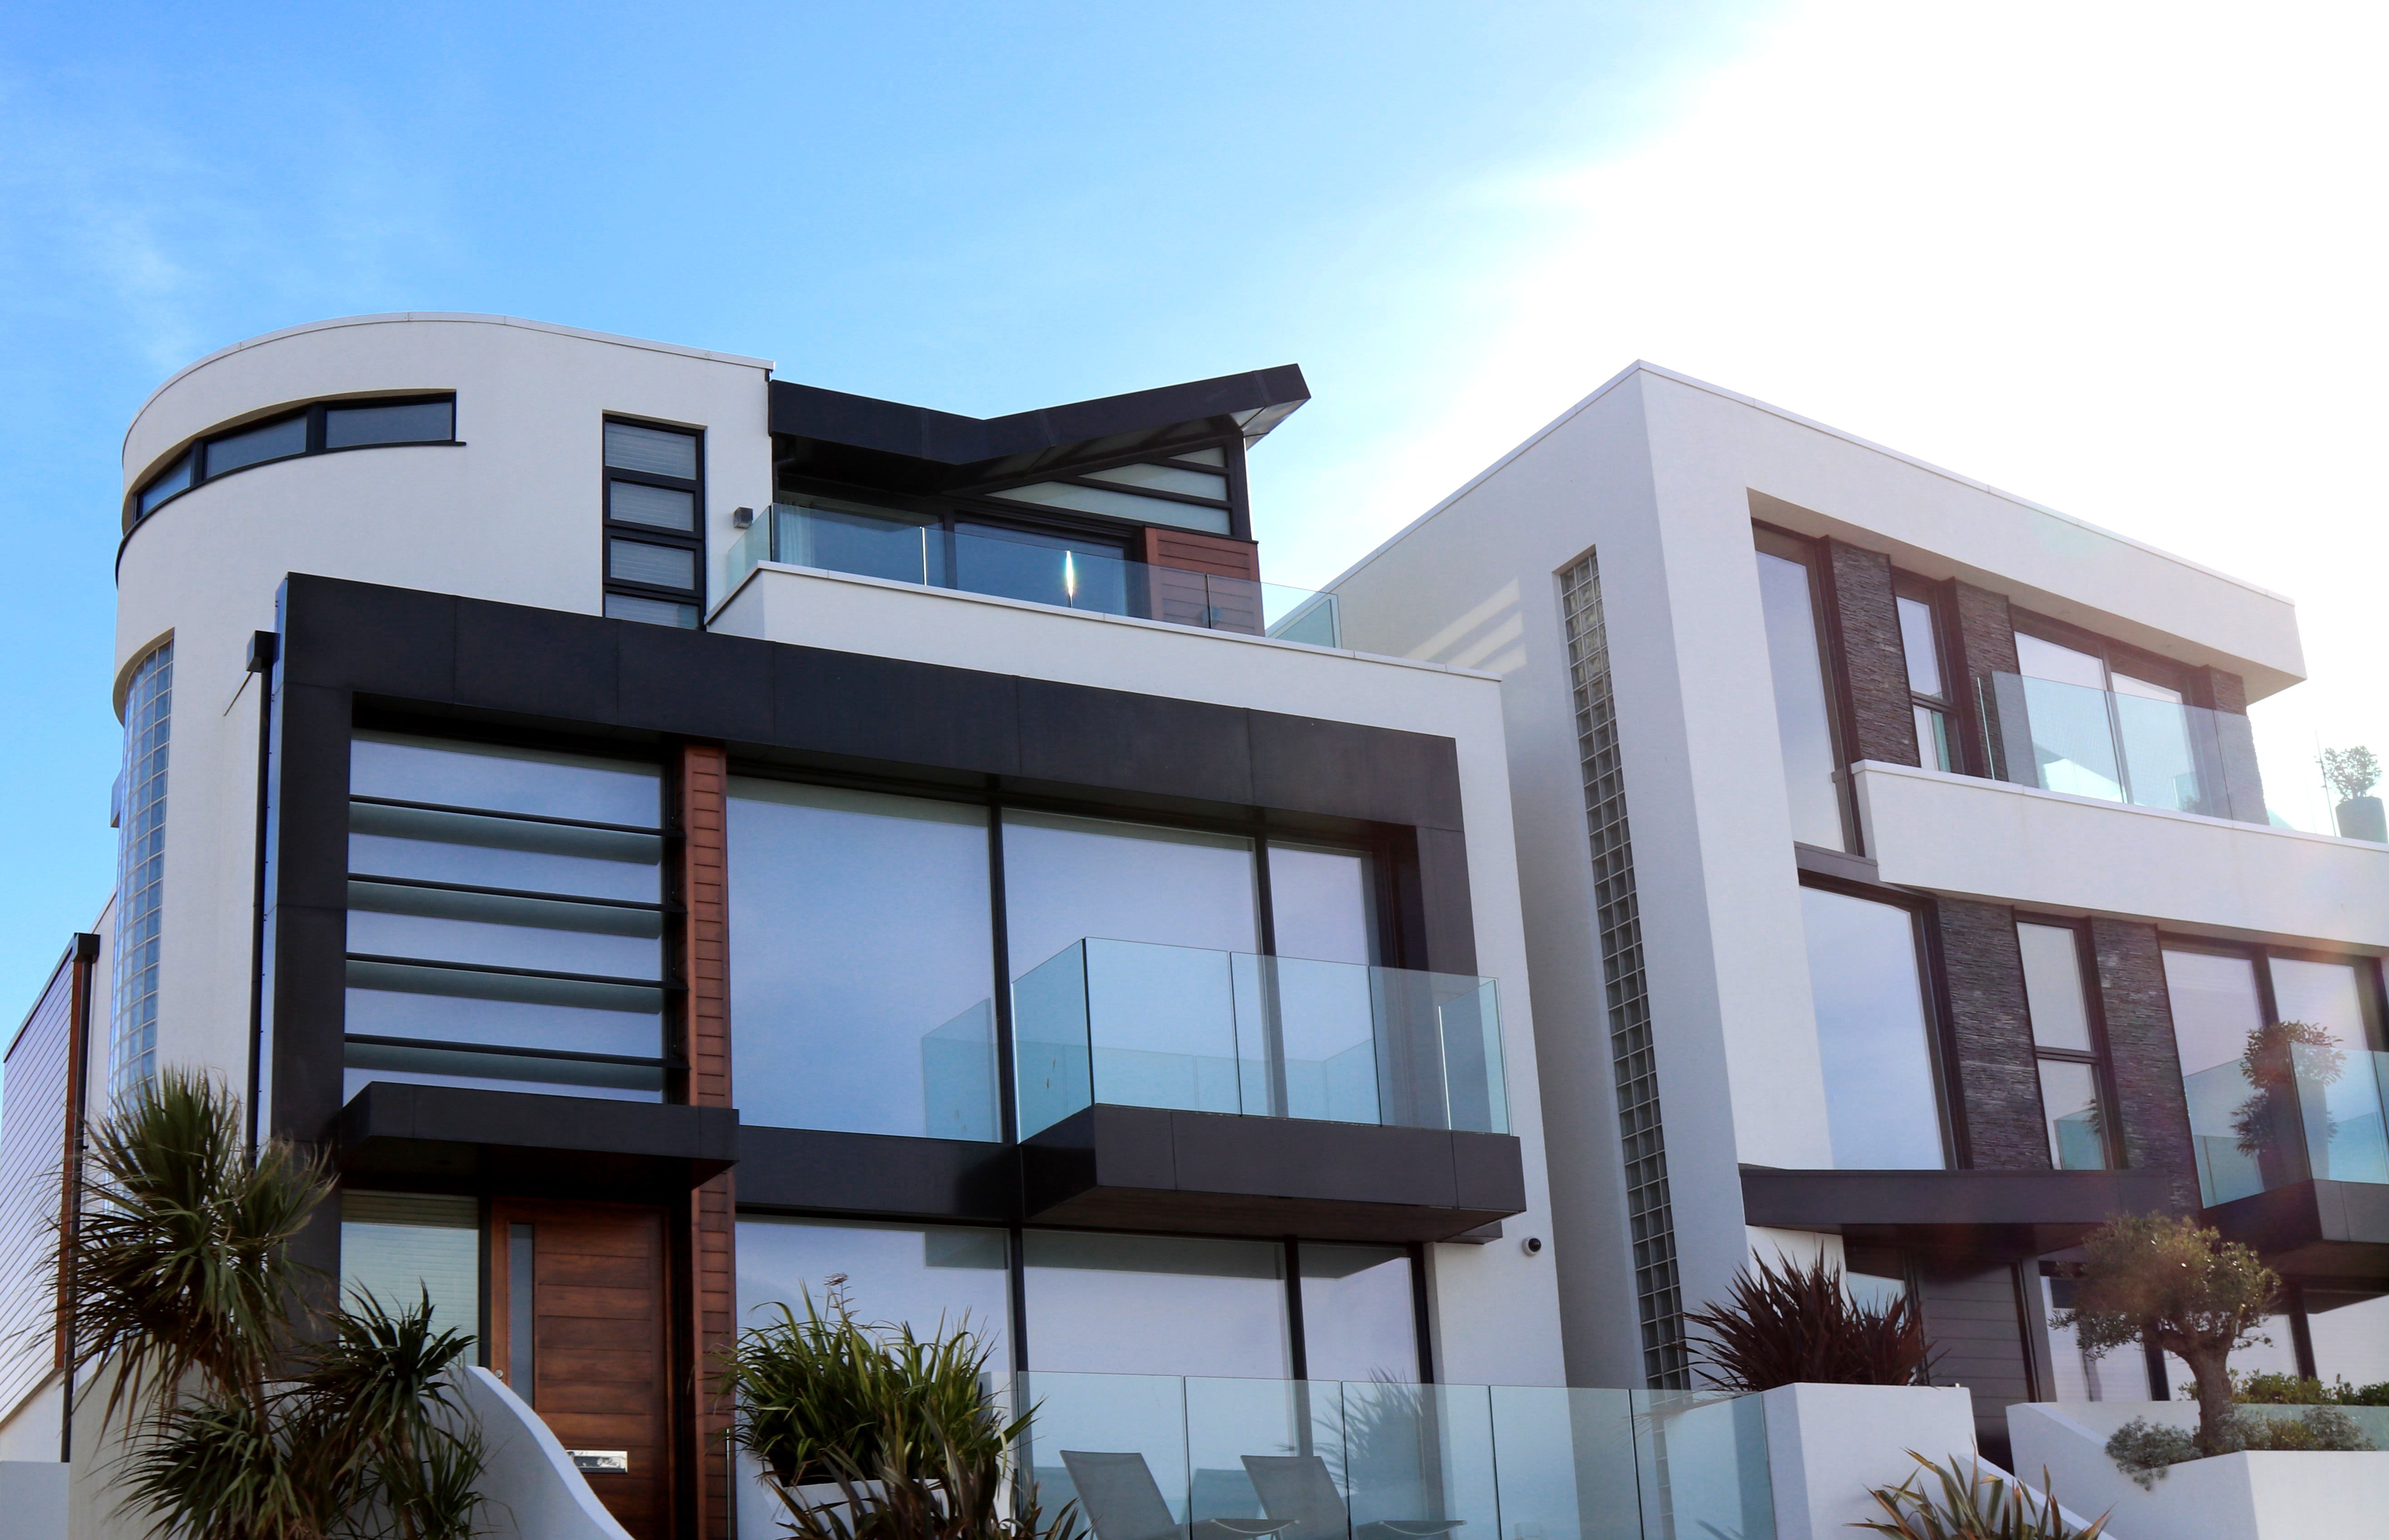
Is the roof of your home in good condition? Don’t feel bad if you don’t know the answer—many homeowners are often unaware of the state of their roof. Out of sight, out of mind, right? Unless there are obvious damages, such as cracks or leaks, it’s easy to forget about this exterior part of your home.


Whether you’re buying, selling, or you’re a homeowner who simply wants to know how to keep your roof in good shape, you’ve come to the right place. Here are three of the most asked questions about roofs.


What are the different types of roofs?
Roof materials come in different forms­: metal/tin, asphalt, wood, cedar, slate, and clay are the most common types. With a plethora of options, it gets tricky when trying to choose the best option for your home and wallet. The type of roof installed on your home depends on a variety of factors such as location, environment, style, budget, building codes, and maintenance requirements. In Canada, asphalt, wood/cedar, and metal roofs are among the most popular.

Asphalt shingles

Life expectancy: 15 to 20 years (or more)


Pricing: $2 to $6 per square foot


Pros: There are a few types of asphalt shingles, but the two main varieties are basic or architectural, with architectural being the more durable of the two. Asphalt roofs are the most popular type of roof in Canada because of the material’s ability to withstand the damp and snowy weather. This type of roof is typically the most affordable of all the options. Additionally, asphalt shingles are relatively easy to install and repair, and they’re fire resistant. Asphalt shingles come in a variety of colours and styles (for example, fibreglass and organic asphalt), so it can be customized to fit any home’s exterior aesthetics.


Cons: Harsh Canadian winters can cause chips and cracks on the asphalt. The material is also prone to mildew and can incur granule loss if not properly maintained. Be prepared for repairs before the 15 years are up.

Wood or cedar shakes

Life expectancy: 35 to 50 years


Pricing: $8 to $15 per square foot


Pros: Wood or cedar shakes are extremely durable, not to mention resistant to harsh weather and insects. For these benefits and more, this type of roof can include a warranty of up to 50 years—depending, of course, on who you buy from. For homes in colder climate and heavy rainfall areas, wood or cedar shakes are an excellent choice because they prevent moisture buildup and they’re naturally insulating. 


Cons: In addition to high upfront costs, the material is not fire resistant (Class C rating), so you’ll need to apply additional treatment to get a Class A rating. Moss buildup can also occur on wood or cedar shakes if they’re not cleaned on schedule (usually every two to three years). Another con for wood or cedar shakes can be their appearance, as many people don’t find them as visually appealing as other materials. 

Metal

Life expectancy: 40 to 70 years


Pricing: $6 – $20 per square foot


Pros: Metal roofs, whether aluminum, tin, copper, zinc or steel, can offer unparalleled longevity. Unlike asphalt shingles, metal roofs require little to no maintenance. You may never have to repair or replace this type of roof, providing it’s properly installed. Metal roofs are great in high snowfall areas because the ice can easily slide off, reducing risk of collapse.


Cons: Metal roofs, because of their premium quality, are expensive. They cost slightly more than wood or cedar, and can be 10 times the price of asphalt shingles. They’re also prone to being noisy during some extreme weather conditions, especially if the installation, or your attic insulation,  isn’t top notch. On the curb appeal front, metal is not always favoured because it can be difficult to maintain colour consistency across the entire roof.

Adding solar panels to your roof

Certain provinces and municipalities offer incentives for energy efficiency, which can help offset the upfront cost of installing solar panels on your roof. The cost will ultimately vary depending on the size of your system and equipment you use, but on average, the price of solar power in Canada is $3.01 per Watt. Adding solar panels can help reduce your monthly energy bills, not to mention help lower your impact on the environment by using a renewable source of energy. Curious to find out if adding solar panels will affect your resale value? We’ve taken a look at whether that’s the case, or you can reach out to a local REALTOR® for their insight on what current trends are in your neighbourhood. 

What upkeep is required to maximize a roof’s life expectancy?

Keep it clear

Make sure your roof is always free of debris, including leaves, sticks, branches, and other naturally occurring particles that can, over time, contribute to the roof’s wear and tear. Make sure your roof is also mildew, mould, and moss free.

Don’t ignore the landscaping

If you have trees near your roof or shrubs close to your gutters, make sure to keep up with the landscaping. Falling branches and other parts can cause premature damage, while shrubs and bushes can block the gutters. Also, trees can make it easy for rodents to access the roof and make it their home, so it is important to keep branches trimmed.

Clean the gutters

Keep your gutters clog-free by getting them cleaned at least once a year. This will prevent water (from rain and snow) from pooling on your roof and causing damages.

Inspect regularly

Depending on the type of roof and warranty it comes with, you may need to get your roof checked annually. If you know what to look for, you can do it yourself, but it’s always best to leave it to the professionals with trained eyes and special tools.

How can you tell if your roof needs repair or replacing?

There are a few indicators something is wrong with your roof. It’s time to call a professional if you see:

  • water spots, streaks, or discolouration on ceilings and walls;
  • a sagging ceiling;
  • cracked or curled shingles;
  • decaying or paint peeling from eavestrough;
  • missing asphalt granules;
  • mould or moss growth;
  • spots without snow, which could indicate a leak; 
  • light coming through from outside;
  • damaged roof deck or flashing (the material that directs water away); or
  • loose roof tiles.


In many cases, the above issues can be easily fixed. Problems like leaks can be repaired by sealing the crack or replacing some shingles. However, you may want to consider replacing the roof altogether if the damage is extensive, if it’s more than 20 years old, or out of warranty. 


A roof replacement may be costly (between $4,700 and $25,000, according to Alpine Credits), but it could save your home from further structural damages and even more expensive repairs in the future. A new roof can also help increase the value of your home because of the safety and curb appeal it adds.


“Roofs are a big ticket item, and significant repairs or replacement count as a major renovation that will help increase the value of your home, similar to upgrading of the windows, furnace, etc.,” says Maniza Khan, a sales representative and REALTOR® with Ottawa-based Rasooli Real Estate Group. “You should take into account the age of the roof, the material used to build it, and what direction the house is facing.”


Source: https://www.realtor.ca/blog/over-your-head-what-to-know-about-roofs/24306/1363
Photo: pexels.com

Read

10 Fool-Proof Decor Tips to Improve Your Interior Design Skills

Most of our homes are works in progress – budget and time are two big factors, but our own design knowledge can also be a constraint. Fortunately, these timeless home-decor tips will show you how to improve your own interior-design skills to create a home that truly reflects who you are.

Read

Floor Renewal Part Two: How to Give New Life to Old Hardwood Floors

If your home was built prior to the 1980s, it’s possible you’ve made a surprising discovery beneath your carpet, vinyl, or laminate flooring—a once-gorgeous hardwood floor. The prohibitive complexity and price of maintenance and repair prompted many homeowners, in previous decades, to cover them over with more cost-effective flooring options. Modern technology, along with DIY know-how, means breathing new life into an old hardwood floor is not only less costly, but a fine way to beautify your space and boost the value of your home.


Ripping up carpet

If you’ve just stumbled upon this exciting revelation or are curious to know if hardwood flooring is hiding in your home, our first article in this series focuses on how to properly remove carpet. We look at checking for hardwood floors without causing undue damage, as well as the steps you should follow to remove carpeting on your own and when to call a professional. 

If you’re ready for the next important steps to renewing a hardwood floor, let’s get started. 

Examine and analyze

Before you run off to the store with dreams of gleaming hardwood floors dancing in your head, remove all furniture and wash the floor thoroughly, then carefully examine every part of the floor to determine how to proceed. Remember, this floor can be more than 40 years old, and as old as Queen Victoria if you live in a century home. 

The key things to look out for are:

  • long or deep gouges;
  • rotten wood;
  • cracks and splits in the boards;
  • wide gaps between boards;
  • protruding nails (in case any were missed when removing your carpet);
  • the original wax finish; and
  • stains or deeply embedded dirt that doesn’t wash off.

If any of the above are present, you’ll have to perform some repair work, which could require fillers, sanding, refinishing, and possible board replacement, depending on the type and extent of wear and damage. On the other hand, if the deep clean reveals a floor with only superficial scratches and wear, you can count your lucky stars, because refinishing will be a much simpler task for you.

A simple refinish

Renewing hardwood flooring that no longer has the original wax finish, and no deep gouges or dents, may only require a wood floor renewal kit from your local hardware store to revive it to a luscious shine. Just bear in mind the polyurethane finish requires 24 hours to set, then seven to 14 days to cure—important factors if you have pets or young children. We’ll go over the steps involved with applying finish shortly.

Repairing hardwood flooring

A wood restoration kit will come in handy to address deep gouges in hardwood flooring. If you have squeaky floorboards, now is the perfect opportunity to hammer those down since you’re already in repair mode—unless you rely on this built-in security system for monitoring teenage past-curfew entries!

Where rotten, split, or cracked boards are concerned, replacing affected sections is the best solution. If you’re experienced with a circular saw, this is something you can handle on your own, but if you are unsure, then you may want to call a carpenter or flooring professional for these repairs. The key challenge is properly matching the colour and grain of the floorboards as best as possible, which can be difficult with some older floors. 

Sand the floor

Here’s where things get dusty, so don a respirator and safety goggles before starting. If you need to remove a layer of embedded dirt or the original wax finish, a belt or drum sander is key—just remember to remove any shoe base moulding and use a floor scraper or putty knife to double-check for any protruding nails before sanding.

Begin with a coarse sandpaper between 36 and 40 grit, and work your way gradually to a finer grit with each pass. Use 60 grit for your second sweep, then 100 grit to smooth the surface further. Remove any dust and debris by sweeping and vacuuming (with a shop vac, not your regular vacuum) between each pass, and use a floor edger or disc sander to get all the corners and edges for a uniform finish.

One final sanding step will help give your floor that professional look—use a floor buffer and fine-grit screening pad with broad sweeping motions to smooth any unevenness or sandpaper scratches. Give the floor another good sweep and vacuum, then use tack cloth to collect any remaining dust particles before applying stain or finish.

Stain and finish

If you’d like to re-stain or change the tone of the floor, now’s the time to select an interior wood stain based on the type of hardwood or desired colour. Work in smaller areas and systematically apply with foam applicators, removing any excess stain with a clean, cotton rag or paper towels.

If you don’t wish to use stain, apply a sanding sealer before finishing.

Once you’re finished with either of the above, you’re ready to apply the finishing coats. Oil or water-based polyurethane wood finishes are the most commonly used these days, with oil-based being the more advisable option as it is thicker and provides a smoother coat. Wood oils like teak, cedar, tung, and Danish, are also popular options. Always be mindful of fumes, wear a respirator, and ensure proper room ventilation. 

Using a lambswool roller or applicator, apply three coats of oil-based finish, or four coats of water-based, sanding lightly between each coat using an extra-fine 220-grit sandpaper or #000 steel wool. This scuffs the surface to allow for the next coat to properly adhere. Be sure to vacuum the dust up before applying the next coat.

Once the final finish has dried (at least 24 hours), replace the shoe guard moulding. Apply felt pads to the feet of all furniture, and limit traffic in the room for seven to 10 days, allowing the finish to fully cure.

Caution: Always hang dry oil-soaked rags thoroughly outside and away from any buildings or structures before disposing of them. Wet oily rags produce their own heat and present a serious fire hazard.


There’s no mistaking that even with a simple refinish, this can be a time-consuming undertaking, but the rewards make it worth the effort. What better conversation piece than a gleaming, beautifully-restored hand-finished hardwood floor? Of course, you may decide after reading this to leave this job to a professional, and that’s OK!! The end result is what’s most important, and as long as you’re happy with the outcome, that’s what matters most. 


Source: https://www.realtor.ca/blog/floor-renewal-part-two-how-to-give-new-life-to-old-hardwood-floors/24422/1367%204/1
Photo: pexels.com

Read

How to Use Décor to Add Warmth to an Industrial Space

Industrial elements tend to appeal to those with minimalist tendencies—the sharp lines and functional philosophies of industrial design are a natural fit if you’re into clean, uncluttered spaces. However, antiseptic interiors aren’t to everyone’s tastes, and there’s no design law that says industrial interiors must equal sterility.

In October 2018, Living Room called industrial design a celebration of bricks and mortar. It’s a style that continues on in new condo and loft construction, though more likely features concrete along with high ceilings and exposed mechanicals.

Warming up an industrial space may be easier than you think, too. The walls, floors, and ceilings of any space are the blank canvas upon which you can paint your personality. Here are a few things to consider as you adapt your personal style to an industrial space.

Colour

Consider the bare brick walls of a vintage warehouse-turned-loft space. Right there, colour delivers warmth, though classic brick walls and are perhaps best classed as factory design–a bit of twist on industrial. It does illustrate how colour palettes can quickly transform design direction. 

Even if you’re working with the neutral tones of concrete or cinder block, large swaths of terra cotta, bare wood, sand, and other naturally warm earth tones make a significant modifier to an industrial setting. Don’t cover all the concrete, though. Ultimate Gray is still in vogue and is one of Pantene’s 2021 Colours of the Year. 

Texture

Steel, glass, and concrete textures are key to industrial design, and each of these tend to lean toward the smooth side of things. Contrast is a powerful tool in design, so adding heavily textured fabrics takes the sterility of an industrial space down a notch. Bonus points when you combine texture and colour to dial down the cool tone of structural components.

Fixtures and furnishings

Colour and texture will also serve you well when it’s time to furnish your industrial home. Consider the impact of a tight, modern black leather sofa versus a mid-century modern fabric version in period-appropriate colour. Both looks work, but the latter adds a warmer impact on the interior space. 

Lighting is another way to add warmth. Try an internet search for “vintage LED bulbs” and marvel at the options. Many of these bulbs fall on the warmer side of the lighting spectrum to give a classic incandescent look, but with contemporary energy efficiency. With a variety of shapes and styles, it’s easy for a bare bulb to shine on its own.

Cross-pollinate

Pure versions of design styles may not exist outside of show homes and design schools. Real living spaces are compromises of family, lifestyle, evolving taste, and the bustle of daily living. We appreciate you might not be thinking about design 24/7. 

Pairing industrial aspects with another design style is one way to alter your course without changing direction. If you like clutter-free, but find minimalism too severe, consider Japanese, Scandinavian, or their hybrid Japandi. Each of these styles retains a minimalist core, but with softer notes that invite comfort. 

Biophilic design elements bring nature and your senses into the same space, adding elements industrial alone doesn’t touch. Natural light, plants, and artwork that echo green spaces connect indoor and outdoor spaces while providing a calm and meditative organic presence. It’s a great way to invite positive vibes into your industrial styled home. 

Plenty of other design styles mesh well within industrial frameworks. Consider Bauhaus, Transitional, Bohemian or Eclectic designs. Upcycling and Shabby Chic can counter the naturally modernist feel endemic to industrial. 

It’s your space and your palette, so don’t be trapped by rigid definitions. Decide what “warm” means to you, and you’ll find a way to bring it to your industrial home! 


Source: https://www.realtor.ca/blog/how-to-use-d%C3%A9cor-to-add-warmth-to-an-industrial-space/24653/1366
Photos: pexels.com

Read

What Homeownership Looks Like for Younger Generations

The COVID-19 pandemic has paved an unexpected path to homeownership for many young Canadians. Sure, mortgage rates fell to historically low rates, but a severe lack of supply and highly competitive sellers’ markets meant many Millennials and Gen Zers were left watching from the sidelines.


As restrictions loosened and life returned back to “normal”, demand for housing increased, pushing prices up in the process. As of November 2021, the average price for a home in Canada was $720,854, a 19.6% year-over-year increase according to data from the Canadian Real Estate Association (CREA).


So what exactly does homeownership currently look like for younger generations?


When it comes to where and how younger generations are choosing to live, it turns out they’re forced to be more practical. Austin D. Titus, real estate broker for Century 21® First Canadian Corp based in London, Ontario, explained while he hasn’t noticed “too much” change in terms of homeownership preferences, he has observed younger demographics are more flexible and understanding of what they can actually afford in current market conditions.


“Often, first-time home buyers or younger generations are less likely to feel comfortable doing renovations and want more of a move-in ready option. I would also say younger generations don’t want much yard work or maintenance,” explained Titus, who added condo living can be an attractive lifestyle for this generation of buyers.


Titus also said as a result of the pandemic, young buyers are looking for homes with additional office or outdoor spaces—a trend that wasn’t as popular before.


Regardless of age, getting into the housing market is a lengthy process requiring a lot of patience, time, and money. But understandably, it can be even more challenging for younger generations if they don’t have adequate savings to compete in today’s market.


Titus says he thinks it’s extremely difficult for younger generations to get into the housing market because they’re dealing with much higher housing prices compared to two or three years ago. Wages aren’t increasing at the same rate as inflation and there are high expectations of first-time home buyers from parents.


“Unfortunately, I also feel buyers are expecting their dream home as their first property,” explained Titus. “In our initial consultation, a lot of what is discussed is actually breaking down the barriers of expectations versus the reality of the market. Parents often put the expectations on their children of what is acceptable versus not in a home and it’s often my job to paint a very different picture.”

Current programs available to first-time home buyers and younger buyers

Purchasing a home can be both exciting and overwhelming. The Canadian government does have a number of financial programs in place to help Canadians during their home buying journey, including incentives for first-time buyers, tax credits, and rebates.


“There are options for the Registered Retirement Savings Plans (RRSP) program where buyers can take from their RRSP and use it as a portion of their down payment,” explained Titus. “This amount currently sits at $35,000, however you must repay it in a 15-year period.”


He also explained first-time home buyers who are permanent residents and Canadian citizens are able to use the land transfer tax rebate, which rebates up to $4,000 of the land transfer tax. 


“The $4,000 rebate caps at $368,000. Any amount over that, and you’re left paying the difference,” said Titus. 


There is also the First-Time Home Buyer Incentive, a shared-equity mortgage with the Government of Canada that offers 5% or 10% (depending on the type of home) of the home’s purchase price to put toward a down payment. There are stipulations, however, such as the borrower’s household income must be less than $120,000 a year ($150,000 if the home you are purchasing is in Toronto, Vancouver, or Victoria).

How parents are helping their kids

In today’s housing market, many younger buyers might find themselves struggling to afford a down payment and meet strict mortgage requirements. As a result, some assistance from parents has become increasingly common. Having the means to be able to help your children buy their first home is a luxury, ​but before you sign on the dotted line, consider the best way to do so. 


“Parents assisting their kids on the down payment wouldn’t have any tax implications for either party,” said Titus. “Co-signing on the mortgage where the parents would be equally responsible for the mortgage would have the largest impact when it comes to selling the property in the future.”


However, Titus says there are ways in which this can be avoided, and it’s best to have either a REALTOR®, accountant or lawyer advise you on the best route to take.


Parents assisting their children can also consider having a 1% ownership in the property, which would allow them to avoid taking high capital gains. But keep in mind, the first-time buyer incentive gets cut in half if there is a co-signer on the mortgage who already owns a property. 


If you’re a parent thinking of using the current RRSP program to help your child, parents aren’t eligible to do so. The current Home Buyers’ Plan (HBP) allows you to withdraw funds from your RRSPs to buy or build a qualifying home for yourself or for a related person with a disability. However, the Canadian Real Estate Association has been advocating for changes to the HBP since 2017, allowing for “intergenerational use of RRSP funds by one child or more for the purchase of a home.” The goal is to help close the gap for young Canadians when it comes to homeownership.


So if you’ve been thinking about entering Canada’s housing market, meeting with a REALTOR® can help you get the answers you need when it comes to programs available and options that would best suit your lifestyle and budget.


Source: https://www.creacafe.ca/what-homeownership-looks-like-for-younger-generations/
Photo: pexels.com

Read

Can Housing Upgrades Affect Insurance?

There’s a lot to consider when you decide to renovate. Aside from choosing the right tile for your new backsplash or the perfect shade of paint, you have to think about insurance. Though home insurance isn’t mandatory in Canada, most mortgage lenders require it before financing, and it can help protect your property and home contents against damages.


Canada’s home renovation sector is now an $80-billion market with a recent survey indicating that 27% of Canadian homeowners have renovated during the pandemic, and another 20% plan on tackling renovations in the near future.


While some renovations can be costly, they can help increase the value of a home. Regardless of the size of your renovation, it’s always important to consider how any improvement will affect your home insurance so you can ensure you don’t run into any implications or added costs.

What types of renovations affect your home insurance? 

Before you make any home improvements, there are a few things you’ll need to consider. Namely, planning your reno, deciding on a budget, and making sure you’re insured, because some upgrades will have varying effects. 


We spoke to Matthew Johnson, customer care manager with Sonnet Insurance, who said any changes that would impact the cost or the likelihood of a claim would typically impact your insurance rates. 


This includes renovations such as: 

  • Changes to square footage;
  • updates to your roofing;
  • changes or updates to the plumbing or wiring;
  • the addition of a fireplace;
  • building a new deck or outdoor feature like a pool; or
  • adding a home office or workshop for your own business, which could result in needing additional liability insurance.


Depending on the company, anything that changes the replacement cost of your home could impact your policy, so it’s important to check with your provider before starting any major renovations. It’s also important to look into home insurance upgrades when adding a rental space. As a landlord, you’ll have additional responsibilities on top of typical homeowner duties.

What types of renovations don’t affect your home insurance? 

On the other hand, most cosmetic changes won’t result in an impact to your insurance rates or coverage. According to Sonnet, updating your kitchen counters or cupboards, changing your flooring, renovating the walls to expand a room, or updating your bathroom are some examples that might not impact your insurance rates or eligibility.


Johnson said, “it’s important to note you should still inform your insurance company of these renovations even if you think they may not impact your insurance rates/coverage.”


We also spoke to Justin Thouin, co-founder of LowestRates.ca, who said while some aesthetic upgrades may increase replacement costs throughout your home, other maintenance upgrades are unlikely to have an impact. Thouin says this includes new paint or other touch ups, like on grout.

When do you need to inform your insurance broker about renovations/potential renovations to your home? 

You should inform your policy provider of any renovations being conducted (or potentially conducted) in your home before the work actually begins. This will help avoid any problems or increases to your insurance rate, and guarantee coverage still exists during construction. Depending on the type of renovation, you may also need to consider adding additional insurance for the duration of the work.


“If you’re doing a major project and you are going to have contractors and builders working on your property, you may be advised to add temporary liability insurance in the event of a worker injury,” said Thouin.


While the company you hire will have some form of insurance in place, it might not fully cover your responsibilities. 


Informing your provider prior to construction beings also helps protect you if anything is damaged during renovations, like if there was a flood, for example. Your provider will be aware, and your new finishes will be covered. What’s more, Thouin says if you’re going to be away from your property for 30 days or more, including because of renovations, you also need to notify your insurer as an extended absence could void your insurance policy. 


Be sure to read the fine print of your policy so you can fully understand your coverage. Of course, if you’re unsure, it’s best to reach out to your provider to discuss your options.


It’s also a good idea to speak with your REALTOR® before starting any major renovations to learn what’s currently trending in your neighbourhood, potentially earning you a better return on investment.


Source: https://www.creacafe.ca/can-housing-upgrades-affect-insurance/
Photo: pexels.com

Read

Cost-Effective Exterior Renovations that Could Help Sell Your Home

Investing in the exterior of your home is important. Not only can exterior home renovations like adding a new roof, windows, or doors add immediate benefits and curb appeal, they have the potential to increase the value of your home and give you a greater return on investment (ROI) when you decide to sell.


A 2021 Canadian Real Estate Renovation Trends report from RE/MAX, which used data collected by Leger marketing firm, said more than half of Canadians renovated their home during the pandemic for personal or “non-ROI” purposes. According to the report, 29% chose to renovate for non-essential “lifestyle” reasons, such as recreation-inspired projects, while 16% of Canadians renovated to increase the market value of their home to sell within in the next one to three years.


Similar to interior home renovations, not all exterior renovations are created equal, with some costing much more up front, while others are relatively more cost-effective. If budget is a concern, read on to learn about some of the most cost-effective exterior home renovations that could help increase your ROI when it comes time to sell.

Why is curb appeal important?

The way your home looks from the outside—or its curb appeal—gives potential home buyers their first impression of the property even before they step inside. This is why exterior renovations that help boost curb appeal are important, as the aesthetic look of a home’s exterior can give the buyer a sense of what they can expect to find once they walk through the front door. In other words, if your home presents itself well, the yard is nicely kept, the paint is vibrant, the siding is aging well, and the roof is in good shape, prospective buyers could be more inclined to look inside if they like what they see on the outside. 

What are the current trends in exterior renovations?

If you’ve been thinking about completing an exterior home renovation project this year, My Design Home Studio suggests while “farmhouse vibes are here to stay,” five other exterior design trends will gain popularity in 2022, including “a shift toward natural textures, a stronger connection to the outdoors, and a minimalist approach to architecture.”  

These trends are: 

  • Natural textures: Blonde woods, hand-sawn beams, and aged brick are popular, but you can recreate these looks at a lower cost with wood-like siding or stone-like accents.
  • Dark exteriors: Pairing lighter siding and brick with moodier blacks and charcoals is becoming a trend, so if you’re looking to sell soon it might be worth the investment now. 
  • Black accents: External features—like door handles, door frames, locks, shutters, etc.—are being swapped out for matte black instead of classic brass or silver. It’s a more modern look without requiring a total overhaul.
  • All-season outdoor entertaining: Adding a patio or deck to your yard can help increase curb appeal, especially when equipped for year-round usage. Covered areas for places with a lot of snow, or lounge areas with an outdoor fireplace (depending on your municipal bylaws) for places that remain relatively dry during the winter, are great additions to help extend patio season.
  • Natural light: Large panoramic windows that will flood your home with natural light are definitely a bigger investment than say, a door handle, but they’re a hot commodity as buyers are looking for homes with more natural light. 

Top exterior renovations to help your ROI

While trying the latest renovation trends is a great way to ensure your home fits the modern look, there are tried and trusted exterior renovations that are not only cost-effective, but also known to help increase a home’s ROI.


According to Alex Obradovich, a REALTOR® and sales representative with Chestnut Park® Real Estate Limited Brokerage in Toronto, the best cost-effective exterior renovations would be “functional over the cosmetic.”


“Taking a good look at what’s necessary to fix will be the most important when it comes to selling your home in the future,” explained Obradovich. “Common items may be drainage, grading, deteriorated items or heating/cooling efficiency problems like making sure windows and chimneys are sealed properly.”


However, once the functional exterior renovations are complete, Obradovich says cost-effective and cosmetic upgrades to improve your home would be painting and tidying up landscaping.


“Plus, both of those can be done yourself inexpensively,” he added.


Other things to look at would be your roof, garage door, front door (steel and fibreglass are becoming popular materials), and siding. The average cost to install an asphalt roof in Canada is around $4,750 (depending on the scale of the project), while replacing a double-car garage door can cost between $1,300 and $3,500. If you’re trying to stay on budget, you can also revamp your home’s exterior by swapping out old furnishings for newer pieces and adding potted plants and annual flowers for a pop of colour.


The best way to assess what your home needs is by enlisting the help of a REALTOR® who will be able to give you insights into what buyers are currently looking for in your neighbourhood and what renovations may help sell your home quicker—and for a better price.


Your REALTOR® can also provide you with contacts for roofers, painters, contractors, etc. to help you find the best person for the job.


Source: https://www.realtor.ca/blog/cost-effective-exterior-renovations-that-could-help-sell-your-home/24343/1362
Photo: pexels.com

Read

Saving for a Renovation? Tips to Keep Homeowners on Budget

Blowing the budget is everyone’s biggest fear when it comes to home renovation projects. Even if you follow standard guidelines—like building in a 20% cushion to cover unexpected costs, vetting contractors, and staying focused—it’s hard to prevent spending more than you’d like to. But with some strategic planning, you can save money in the lead-up to your big remodel and cut costs without cutting corners. 

1. Figure out your priorities

We get it: You’re super excited to get into your new house, and you can’t wait to make it yours. But before you start envisioning walls coming down, scale down your big dreams, suggests Toronto financial counsellor Jessica Moorhouse, who is also host of the Mo’ Money Podcast. 


“Yes, there’s a long list of things you want to do to improve your property, but be patient,” she says. “Take your time and slowly save up so you can pay for the renovations in cash.”


Avoid taking on more debt by making a list of what must get done versus what you wish can get done, a strategy that paid off for Moorhouse, who bought a house four years ago and made improvements without borrowing more money.


“We’ve paid for everything in cash, living within our means and saving up for those renovations. It makes us feel good, because we didn’t have to worry about adding more debt onto our budget. That’s the best strategy.”

2. Take a closer look at your new home’s utilities

Instead of simply swapping your name onto the property’s current utility bill, shop around for a better deal. 


“See if another utility company can provide the same service for less money,” suggests Moorhouse. 


“Sometimes, it’s so chaotic when you settle into a new home, but don’t let your home insurance auto-renew without checking with different providers to see if you can get the same policy for a cheaper price; that could save you hundreds, if not thousands of dollars in the long run.” 


Other things you can probably get a better deal on include your internet, cable or satellite provider. 

3. Keep yourself accountable

Instead of focusing on cutting out your daily $7 latte, Moorhouse recommends tracking your spending and making a budget to see where all your money is going. 


“Look at every single line item and ask if it makes sense or if you get the same thing for less money,” she says. “Doing that–especially for monthly bills–is important, because if you can decrease those expenses, you’ll be saving much more money.”


One way to make sure you stick to the saving mindset? Plan a year ahead. 


“Don’t just decide to redo a room on a whim; sit down and ask yourselves, ‘What are we doing this year?’,” says Moorhouse.  


“I’ve got a whiteboard on my fridge outlining what we’d like to do in priority sequence. We know we won’t do reno number two until number one is paid in cash. Keep checking in with yourself about your financial plans.”

4. Out with the old, in with the not-so-new

Instead of paying full price for new furniture, appliances and decorative accessories, check out online marketplaces where you can buy or sell just about anything. 


“Our previous owners had put in a brand-new, but ugly stove that had never been used, so we sold it and used the proceeds to buy a new one,” recalls Moorhouse. “Something you don’t like may be exactly what someone else is looking for.”


You may also want to check with friends, neighbours and family to see if they’re purging things you might need. For example, repurposing someone’s kitchen cabinets or leftover construction materials can save big bucks. Or, purchase good quality second-hand furniture that can be transformed with a coat of paint, adds Moorhouse. 

5. Don’t forget about un-sexy home improvements, like maintenance

In addition to your budget for upgrades, set aside money for when things ultimately break down, cautions Moorhouse. 


“We bought a 12-year-old place and once we got the keys, things started breaking down: We had to replace our air conditioning unit, our boiler, our dishwasher and our fridge,” she recalls.


Although these purchases weren’t high on Moorhouse’s wish list, she knew going in to expect repair and maintenance costs, so the funds were there. 


“Depending on how old your house is, you need to set aside one to 2% of your home’s value for maintenance every year,” she suggests.


Your home inspection report can be a valuable tool; many inspectors include a range of fees associated with maintenance, repair and replacement costs. Keeping these tips in mind as you plan your renovation will save money and buy peace of mind.


Source: https://www.creacafe.ca/saving-for-a-renovation-tips-to-keep-homeowners-on-budget/
Photo: pexels.com

Read

6 Things to Know About the Offer Process

Buying the perfect home is not as simple as it can look on TV. Buyers and sellers must first navigate the offer process, which can involve many steps and quick decisions. Here’s what first-time buyers and sellers can expect, and how your REALTOR® can help guide you throughout.


1) What must happen before you can make an offer?

Many renters think they can move on a house right away. But first, there are some things to take care of, says Katia Samson, a REALTOR® with RE/MAX L’ESPACE in Montreal.


“It’s very important to give your landlord notice three months before the end of the lease, because leases are usually renewed automatically every year,” explains Samson.


Next, get pre-approved for your mortgage unless you’re paying cash, she adds.


“Meet with a mortgage broker and provide all the required financial documents, so you can establish your budget and know what you can afford.”


Once that’s done, meet with REALTORS® to find a perfect match, explain what you’re looking for, and start an active search.


“REALTORS® have inside information about certain condo buildings and areas,” says Samson. “REALTORS® can also send you documents faster, such as the seller’s declaration, certificate of location, and any relevant financial documents.”

2) How is an offer drawn up?

When buyers are ready to make an offer on their chosen property, they must inform their REALTOR®, who will then advise the listing agent, says Samson.


“Otherwise, as soon as you walk out of a property, you don’t have to be informed if another offer comes in. This is especially important in this market, where we’re getting multiple offers,” she explains. “Your offer would include the price, the date of closing, and whether it’s conditional upon inspection (or other terms) and a review of documents.”

3) How long does the offer process take? 

Depending on whether yours is the only offer or if there are many other buyers interested, the entire offer process can be completed in as little as a day or take up to a week. 


“Right now, many properties are coming on the market with an established schedule for visits, offers, and deadlines,” says Samson.

4) What happens when there are multiple offers?

If you’re competing with other buyers, your REALTOR® might suggest being flexible with some conditions, and going in with your best offer. 


“It’s usually a one-shot thing: there are no negotiations when there are multiple offers,” adds Samson.


Some buyers write a letter to the sellers and include photos of themselves when there are multiple bids. 


“Some people like to know who they’re selling to because it’s not just financial, it’s also very emotional,” she says.

5) Are offers done in person or digitally?

First-time sellers might remember when they bought their home years ago and how everyone met in person to sign all legal documents; however, technology has changed that, says Samson.


“Everything is done electronically now and it’s so efficient,” says Samson. “All offers are emailed, and it’s very rare offers are presented in person to the listing agent.”


If the seller wants to counter-offer, negotiations will also be done digitally until both parties agree to terms, or someone decides to walk away. 

6) Should sellers accept the first offer that comes in?

Sellers shouldn’t feel pressure to respond quickly, says Samson.


“If I list a property and get an offer that’s valid for 24 or 48 hours, but I have a lot of interested clients and brokers, I’ll advise my seller to let that offer expire so everyone else can come in,” she says. “If someone’s really interested in your property, they’re going to wait; it’s in the seller’s best interest to allow about a week for those visits.”


Remember,  REALTORS® are trained to navigate the offer process from start to finish, helping both buyers and sellers meet their goals. Meet your home buying or selling MVP today if you’re ready for a move.


Source: https://www.realtor.ca/blog/6-things-to-know-about-the-offer-process/24562/1362
Photo: pexels.com

Read

When Is the Right Time to Move?

Deciding whether or not it’s time to move—either across the country, province, or within the same city—is a difficult decision to make. Are you ready to uproot your life and leave your friends, family, and job behind? Are you ready to either sell your home, end your lease, or move out of your parents’ home for the first time? Regardless of your situation, deciding to move is a momentous life event and one that doesn’t often come easy.

If you’re unsure whether or not moving is the right call right now, read on to learn about some of the different reasons why people often choose to move to a new home.

Common reasons people choose to move  

There are, of course, the obvious reasons why you might consider moving. Perhaps you’re starting a family and you need a bigger home with a fenced-in backyard where the kiddos can play. Or, maybe all of your children have moved out and you’re ready to downsize. 

But other common reasons could be:

  • you’re growing tired of your commute to and from work; 
  • you have safety concerns in your neighbourhood;
  • you aren’t getting along with your neighbours; or 
  • you’ve received a job offer in a new city.  

To get a better understanding of why some homeowners have recently decided to move, we spoke to James Strathy Warren, a REALTOR® and salesperson for Chestnut Park Real Estate Ltd. Brokerage, who revealed some of the frequent themes he’s seen from his clients.

Future planning

Warren says a change in interest rates can be a factor. When people find out interest rates are going up, they’ll look at moving beforehand to lock in on a competitive mortgage to save money in the long run. Not everyone moves when the interest rates change, but it’s something that can trigger people to start assessing the market and whether they’re happy where they are. 

Bang for your buck

Finding a renovated house in a “move-up” market can be a big deciding factor for many people. Warren suggests this can be less expensive than finding a home that requires a substantial renovation, which is appealing to those who don’t want to go through the process.

“There’s also the time factor of a lengthy renovation as well as the associated costs,” he explained. “So, essentially you’re buying your new home at a slight discount.”

Market trends

For those looking to move up, Warren explained sometimes in a market that tends to pull back in price increases, the spread can be less between the sale price of their existing home and the one they’re purchasing. For people scaling down, such as empty nesters, when the market is moving up, it can be a great time to sell.

“It’s always good to try and time the market, this is very important for people moving up,” said Warren.

Time of year

When moving out of a home, Warren said historically, the best months to sell for the highest sale price are usually February and May.  

“February, because January is usually hit with snow and there is so little [on the market], so appetite gets pent up,” he explained. “May, because everything is geared to the school year and people want to settle prior to summer vacation and the beginning of the school year. Sometimes we do see a good market in late September and early October when there is generally less supply.”

How can a REALTOR® help you make your decision?

Ultimately, when it comes to deciding if you should move, it’s up to you and your family to make the call. A REALTOR® can guide you through the decision process to ensure you’re making the move for all the right reasons, providing current market trends and conditions, and asking the right questions to help you feel informed in your choice.


A REALTOR® can also share properties available in your price range and desired location; answer any questions you have about different local neighbourhoods and property values; and they can help you decide whether or not it’s the right time to buy based on the market.


Warren says being aware of the market and how homes are performing in the areas you’re considering is very important when it comes time to decide whether or not you should sell your home.


“I think to be successful in a purchase, or when you’re selling your home, you should view houses first and get an idea of the houses available to you and watch their movement—their days on market and their sale prices. If you’re comfortable, then jump in and buy first, but make sure your home is looking its best and well-priced before putting it on the market,” said Warren.


Working with a REALTOR® also gives you a better understanding of what’s happening in the market and if it’s the right time to make moves.


“It’s all about ‘reading the market’ and hopefully connecting the pieces of the puzzle,” added Warren.


While the prospect of moving might be daunting, there are different factors and indicators to help make your decision. If you’re thinking about embarking on a home buying journey, be sure to speak with a REALTOR® today.


Source: https://www.realtor.ca/blog/when-is-the-right-time-to-move/24677/1362
Photo: Pexels.com

Read

10 Cozy Reading Nook Ideas Every Bookworm Will Love

Picture the perfect cozy afternoon at home: what does it look like? If you’re envisioning a cozy reading nook, a warm blanket and a good book, then you’re in luck – from comfy bedroom reading nooks to elegant reading rooms to multi-functional spaces ideal for daily reading retreats, we’ve rounded up 10 reading nook ideas to inspire you.


Read

No matter what plants you have in your collection, they all have similar basic needs. Here's how to keep them in tip-top shape.


If you're a new plant parent, all of the care that goes into keeping your houseplants happy can feel a little overwhelming at first. However, most of your plants won't need constant attention to stay healthy. Other than remembering to water, there are plenty of easy-care houseplants that will only need a little maintenance a few times each year. When you need to step in and do some pruning or snip away a few leaves that are starting to turn yellow, these tips will give you the knowledge you need to care for your plants with confidence.

1. Watering Your Houseplants

All houseplants have slightly different watering requirements, depending on how they're grown and changes in plant growth through the seasons. It's best to water on an as-needed basis rather than by a set calendar schedule. In general, plants grown in well-drained soil in an appropriate-size container should be watered when the top 1/2 to 1 inch of soil feels dry. Cacti and succulents need less water; flowering plants usually need slightly more. Overwatering is one of the most common causes of houseplant death. If you're not sure how much to water, it's better to err on the dry side than to give your plants too much moisture.

2. Fertilize Houseplants Periodically

Like watering, there's not an easy rule to know how much to fertilize: It depends on the plant's growth rate and age, and the time of year. Most houseplants put on a growth spurt in spring and summer, so this is the best time to fertilize them. During the short days of fall and winter, most houseplants don't need much, if any, fertilizer. Follow label directions to know how much plant food to use.

Like overwatering, it's important to avoid overfertilizing your houseplants. Too much fertilizer can burn their roots and stunt their growth. For flowering varieties, use a fertilizer in which the three numbers on the label (nitrogen, phosphorus, and potassium, respectively) are relatively equal. If the nitrogen content is too high, the plant may grow a lot of leaves, but few flowers.

3. Propagate Houseplants When Needed

Several types of houseplants benefit from being propagated by division or other methods once in a while. It helps to rejuvenate an overgrown plant and encourage fresh growth. Plus, it's an inexpensive way to get more plants out of the ones you already have.

Some houseplants, such as bromeliads, send up new shoots at the base of the plant or offsets, which you can divide and put into new pots. Climbing houseplants such as philodendron and pothos form new roots where their stems come into contact with soil, so they're good candidates for starting new plants from cuttings. And you can root new African violets from a single leaf; just put the stem end in a bit of water for a couple of weeks.

Other houseplants, such as spider plant and strawberry begonia, reproduce by sending out runners with new plantlets at the end. It's super simple to root these to start new plants; usually, you just need to soak the base of the plantlets in water for a few days to help them develop roots, and then you can plant them in soil.

4. Repot Overgrown Houseplants

Not sure if your houseplants need repotting? Check the root systems. If the roots are circling the inside of the container, it may be time to repot the plant. If the plant has outgrown its pot, you can transplant it into a slightly larger container. If you'd like to keep it in the same pot, trim off some of the roots with a sharp knife and replant it into the container using fresh potting soil.

As you repot your houseplants, it's also a good time to divide those with multiple stems to create new plants. Spring and summer are the best seasons for repotting your houseplants.

5. Remove Dust From Plants

Almost all houseplants look better with regular cleaning. Dust collects on leaves, so wash them with a gentle shower of room-temperature water or dust them with a soft brush if the plants have hairy leaves (which can hold onto moisture and encourage disease). For plants with smooth leaves, you can also use a cloth to gently wipe away any dust that collects on leaves. Not only does this improve your plant's appearance, but it'll actually help it to soak up more light.

6. Prune and Pinch Back Houseplants

You can prune any time of the year, but fall is a natural time to break out your pruning scissors ($13, The Home Depot) after a summer of growth. The main reasons for pruning houseplants are to make them look better and keep them from getting too large. Similar to propagating, cutting overgrown houseplants back to 4 to 6 inches tall helps rejuvenate them. This technique is effective in encouraging new growth for trailing plants such as Swedish ivy and pothos that may have become bare at their bases. Try to make your cuts just above a set of buds or side shoots on a stem you want to cut back. These are where the new growth will start. Also, remove any dead or diseased leaves and stems to help prevent the problem from spreading.

Pinching means removing stem tips, either with your fingernails or pruners. Pinch out the tip of a stem and the topmost leaves to encourage the growth of side buds. Plants that grow rapidly often look best with frequent pinching to keep them compact and fuller.

7. Deadhead Flowers and Remove Dying Leaves

Trim faded flowers from your plants to encourage more blooms and help prevent disease problems. While you're at it, be sure to remove yellow, brown, or withered leaves. Use a narrow-blade hand pruner ($11, The Home Depot) or sharp scissors to make a clean cut without tearing the plant's stem. It's a good idea to wipe off the blades of your pruners with rubbing alcohol before moving on to a different plant to avoid spreading any pests and diseases.

8. Control Insect Pests

Several insects commonly attack houseplants. Insecticidal soap ($6, The Home Depot) is an easy-to-use, effective treatment for most soft-bodied pests such as aphids and spider mites. A forceful spray of water from the hose helps knock down the population of these pests, too. Rubbing alcohol is effective on insects with waxy coatings such as scale and mealybugs; dab it on with a cotton ball.

No matter what treatment you use, be consistent. For fast-reproducing pests such as aphids and spider mites, you may need to treat plants once a week for a month or so to be rid of the pests

Fungus gnats are tiny black flies that buzz around the soil, and a common houseplant pest, though they're often confused with fruit flies. You typically see fungus gnats in large numbers when plants are overwatered. Allow the soil surface to dry between waterings and make sure to clear away any dead leaves on the soil surface. In extreme cases, you may want to try repotting your plant into fresh soil and a clean container.

9. Watch for Houseplant Diseases

Remove and destroy diseased houseplants or affected leaves or stems as they develop to prevent the spread of the disease. Some diseases spread by insects, so keeping the insect population in check helps prevent these problems. A few common houseplant diseases to keep an eye out for include powdery mildew (looks like powdery white spots on leaves), fungal leaf spots (can be yellow, brown, or black spots on leaves), and root rot (mushy, dark-colored roots usually caused by overwatering).


 Source: https://www.bhg.com/gardening/houseplants/care/houseplant-care-guide/
Read
MLS® property information is provided under copyright© by the Vancouver Island Real Estate Board and Victoria Real Estate Board. The information is from sources deemed reliable, but should not be relied upon without independent verification.